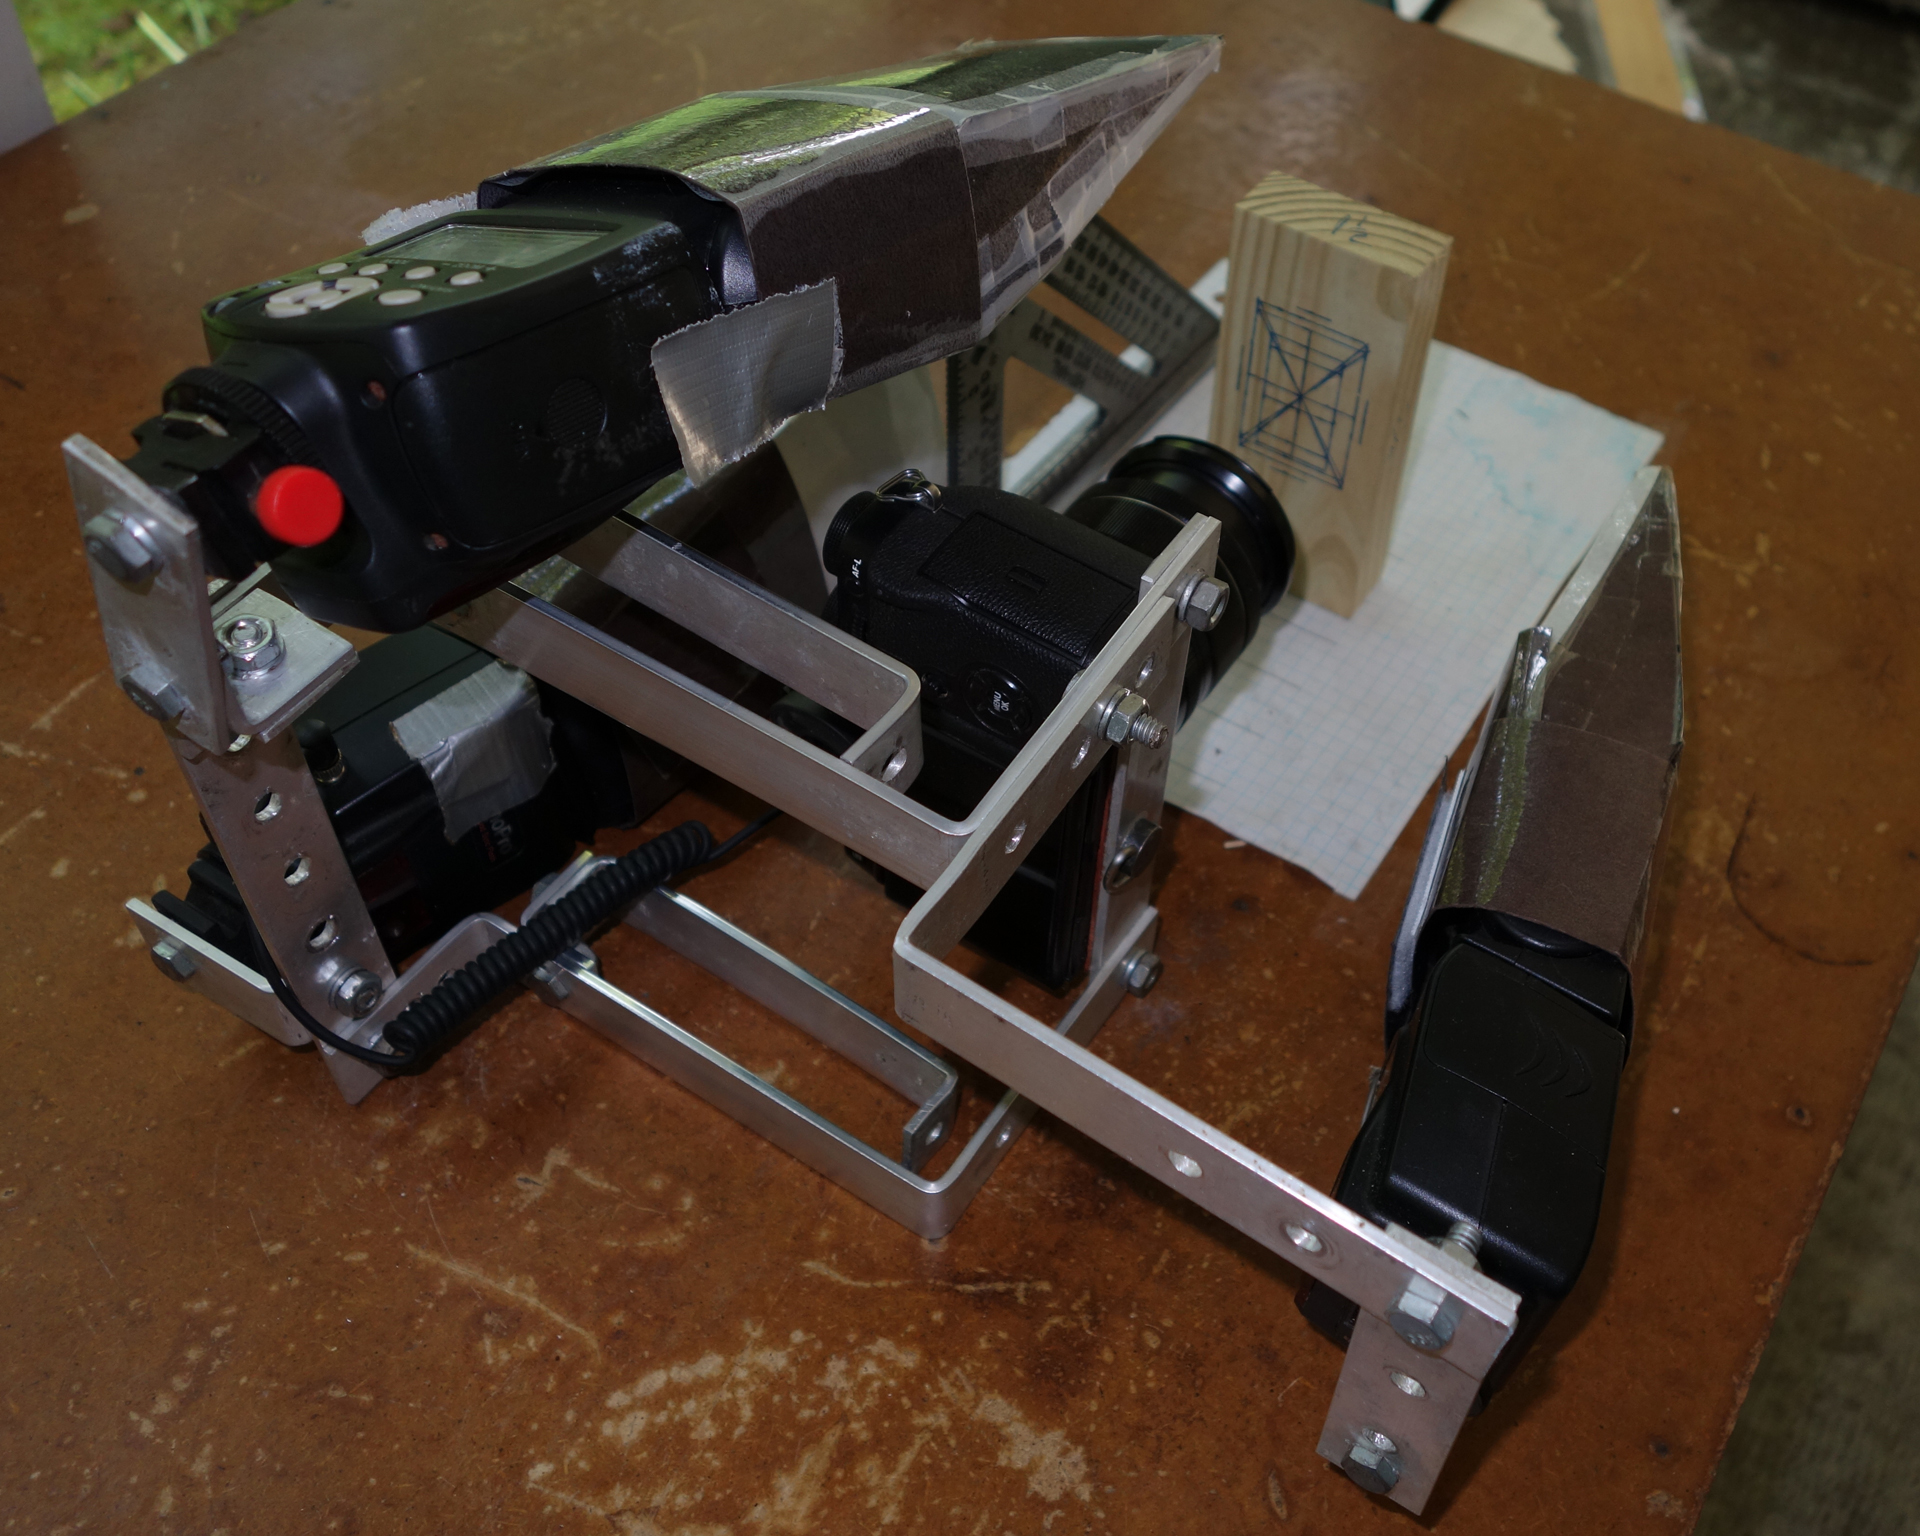
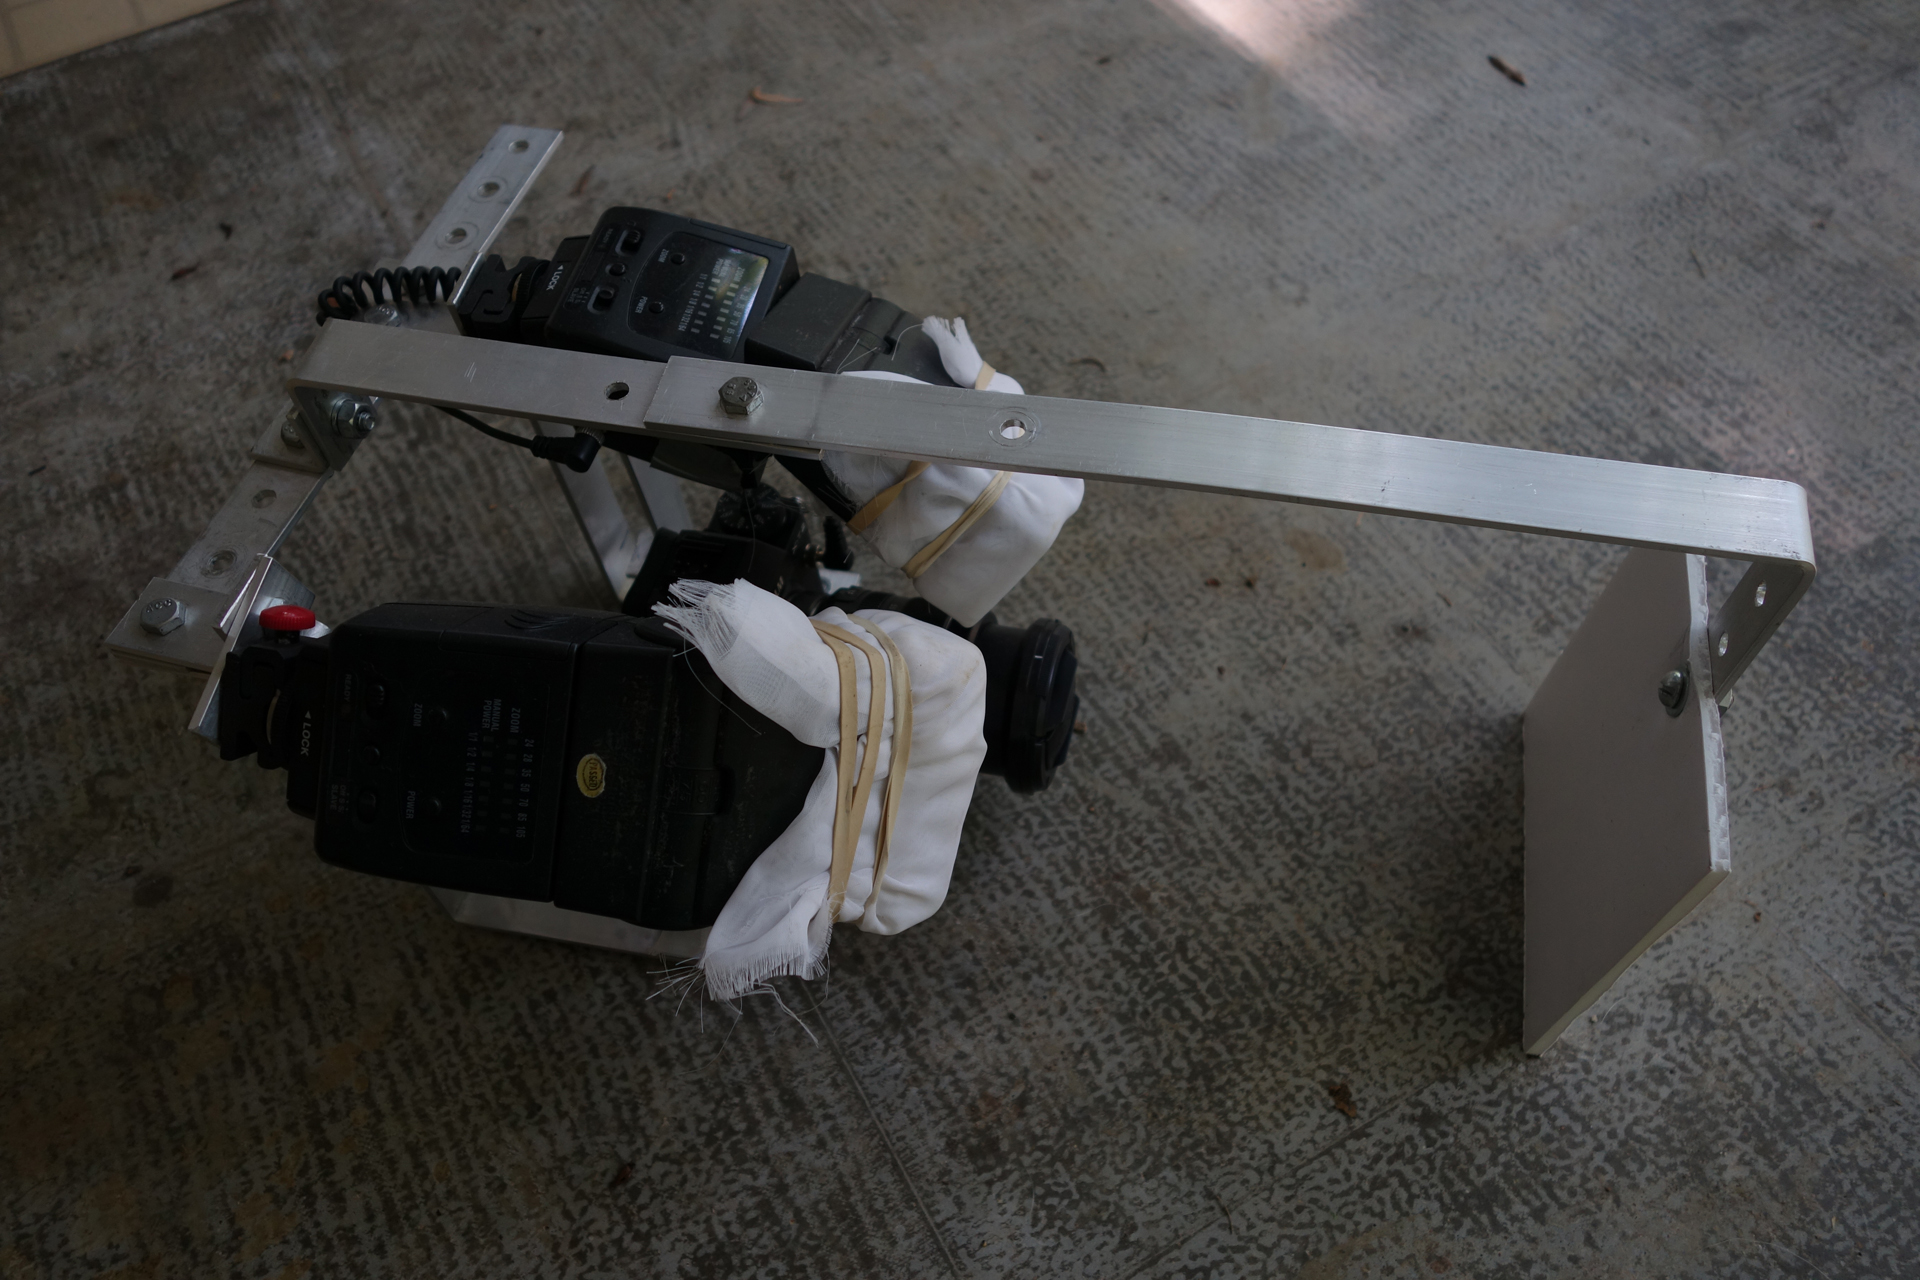
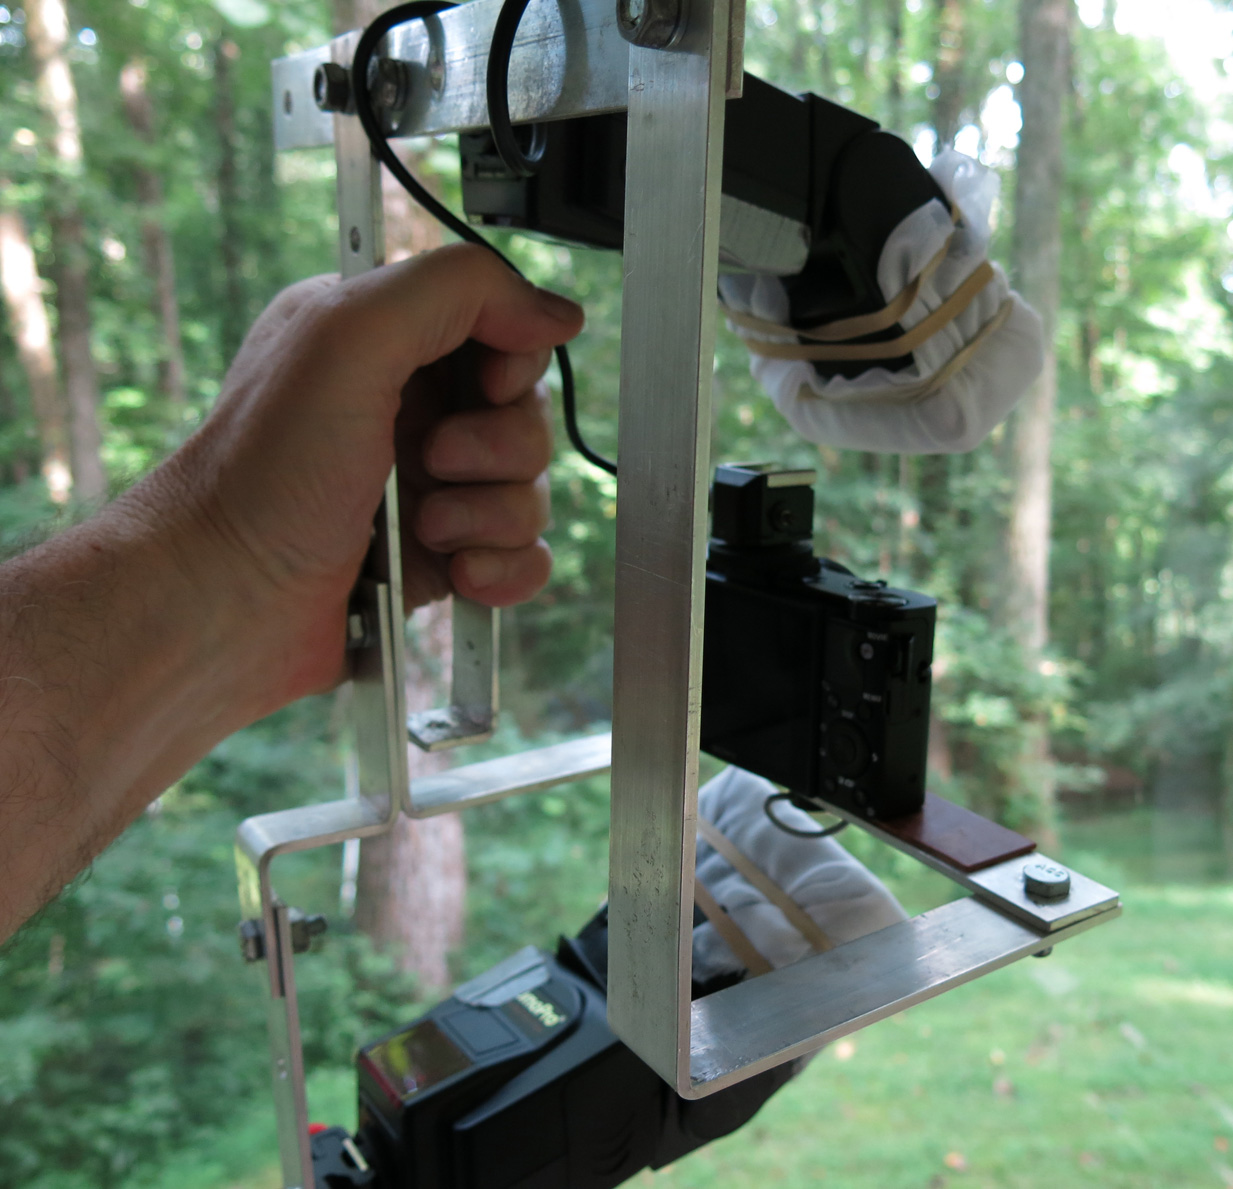
Fuji X-T2, 24 mp, 18-55mm lens, 11mm extension tube
Camera bracket 2023. Essentially the same main bracket as previous years with different placement of the lights. The focusing block has so many lines on it because I messed it up twice and it has rectangles for focusing at 2.5 inches and 3 inches. Its easy to focus on though, and I can tell how big my field is at that zoom level. The paper taped to the table is quarter inch graph paper. While shooting, my left hand is holding the far side handle. My right hand is on the camera and shutter button. I am shooting vertical looking down on the lens. Notes below are edited versions of old comments made same time as original photo.


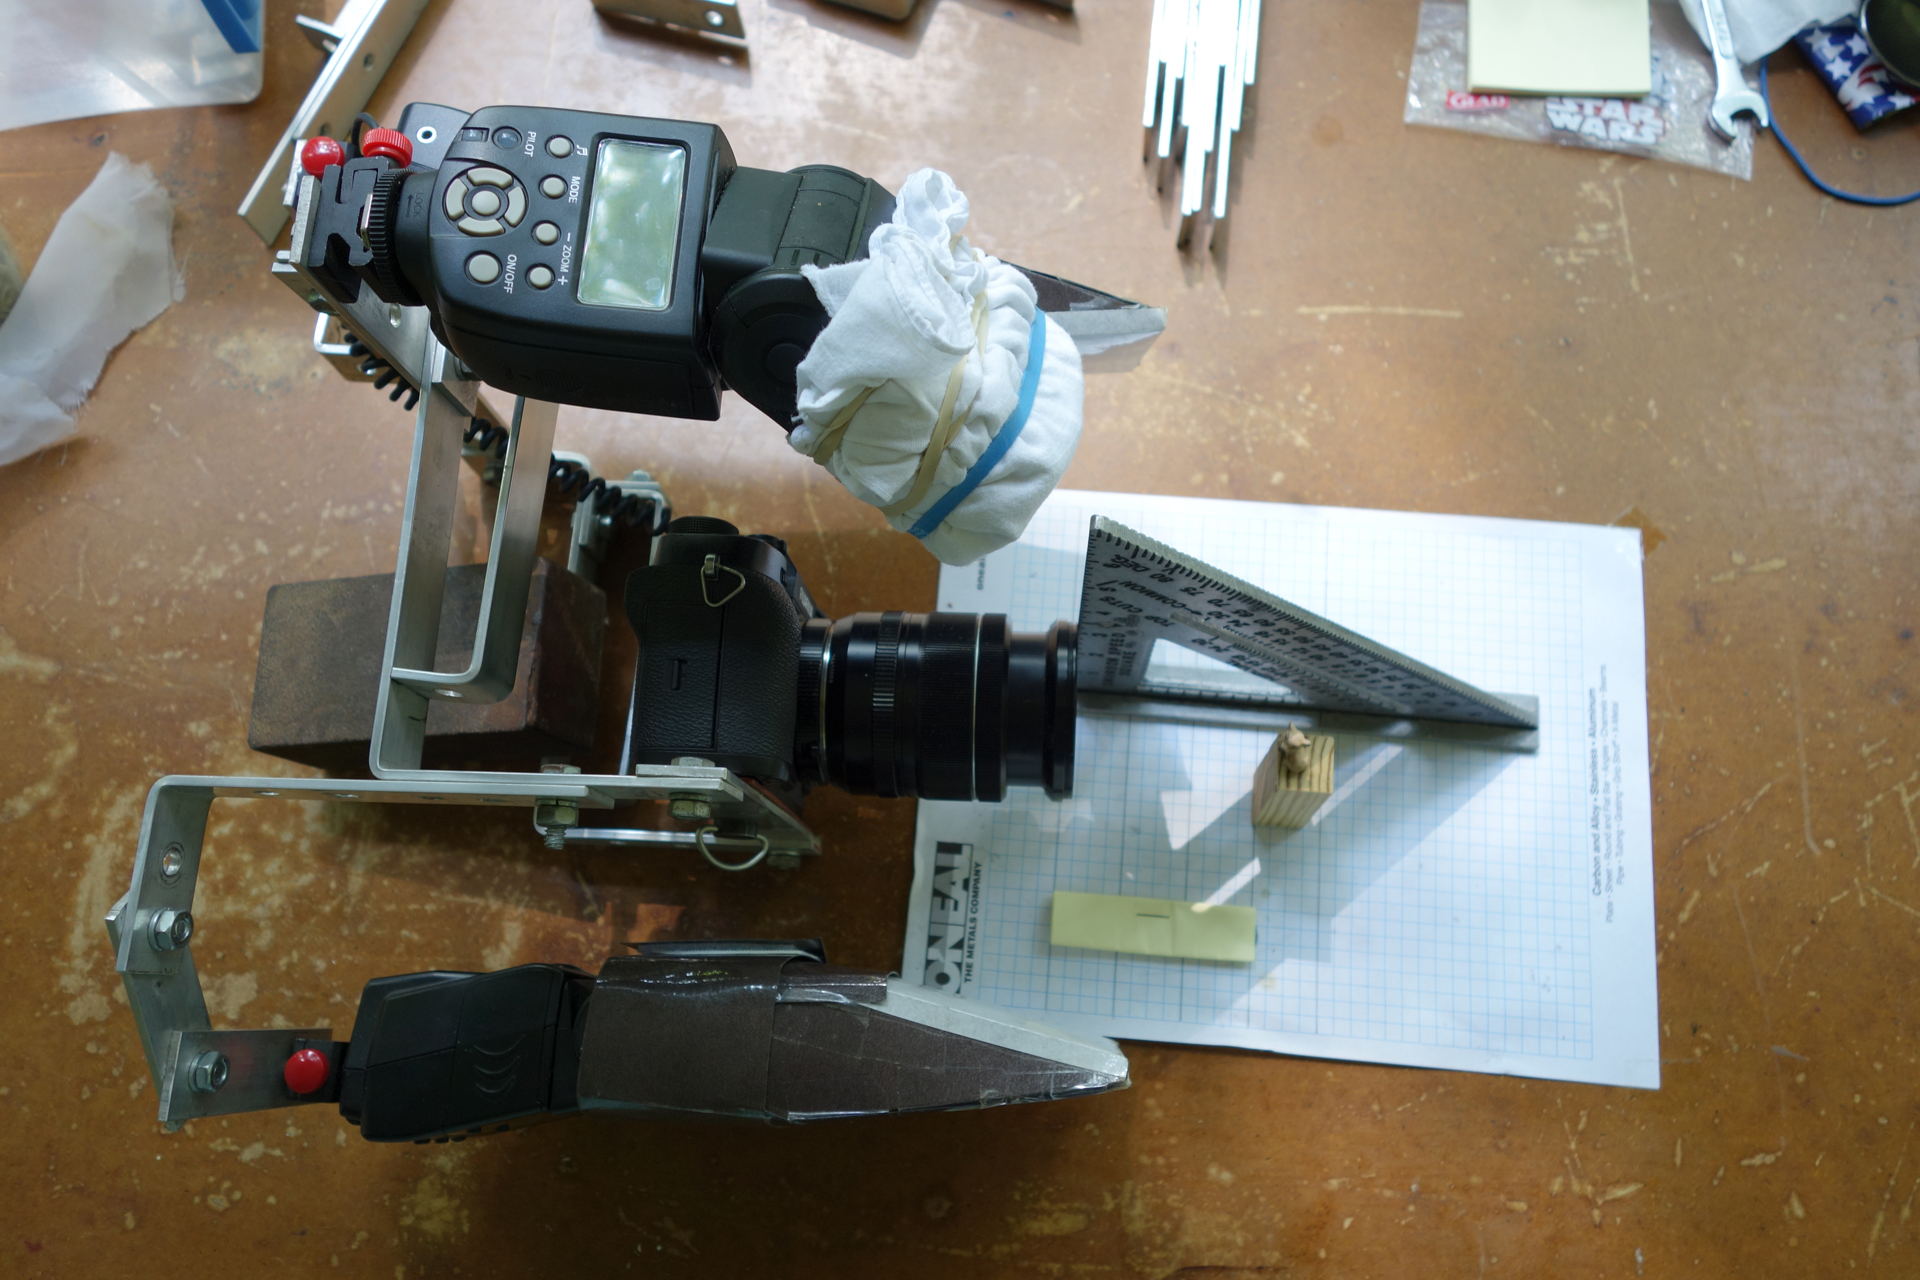
Fuji X-T2, 24 mp, 18-55mm lens, 11mm extension tube
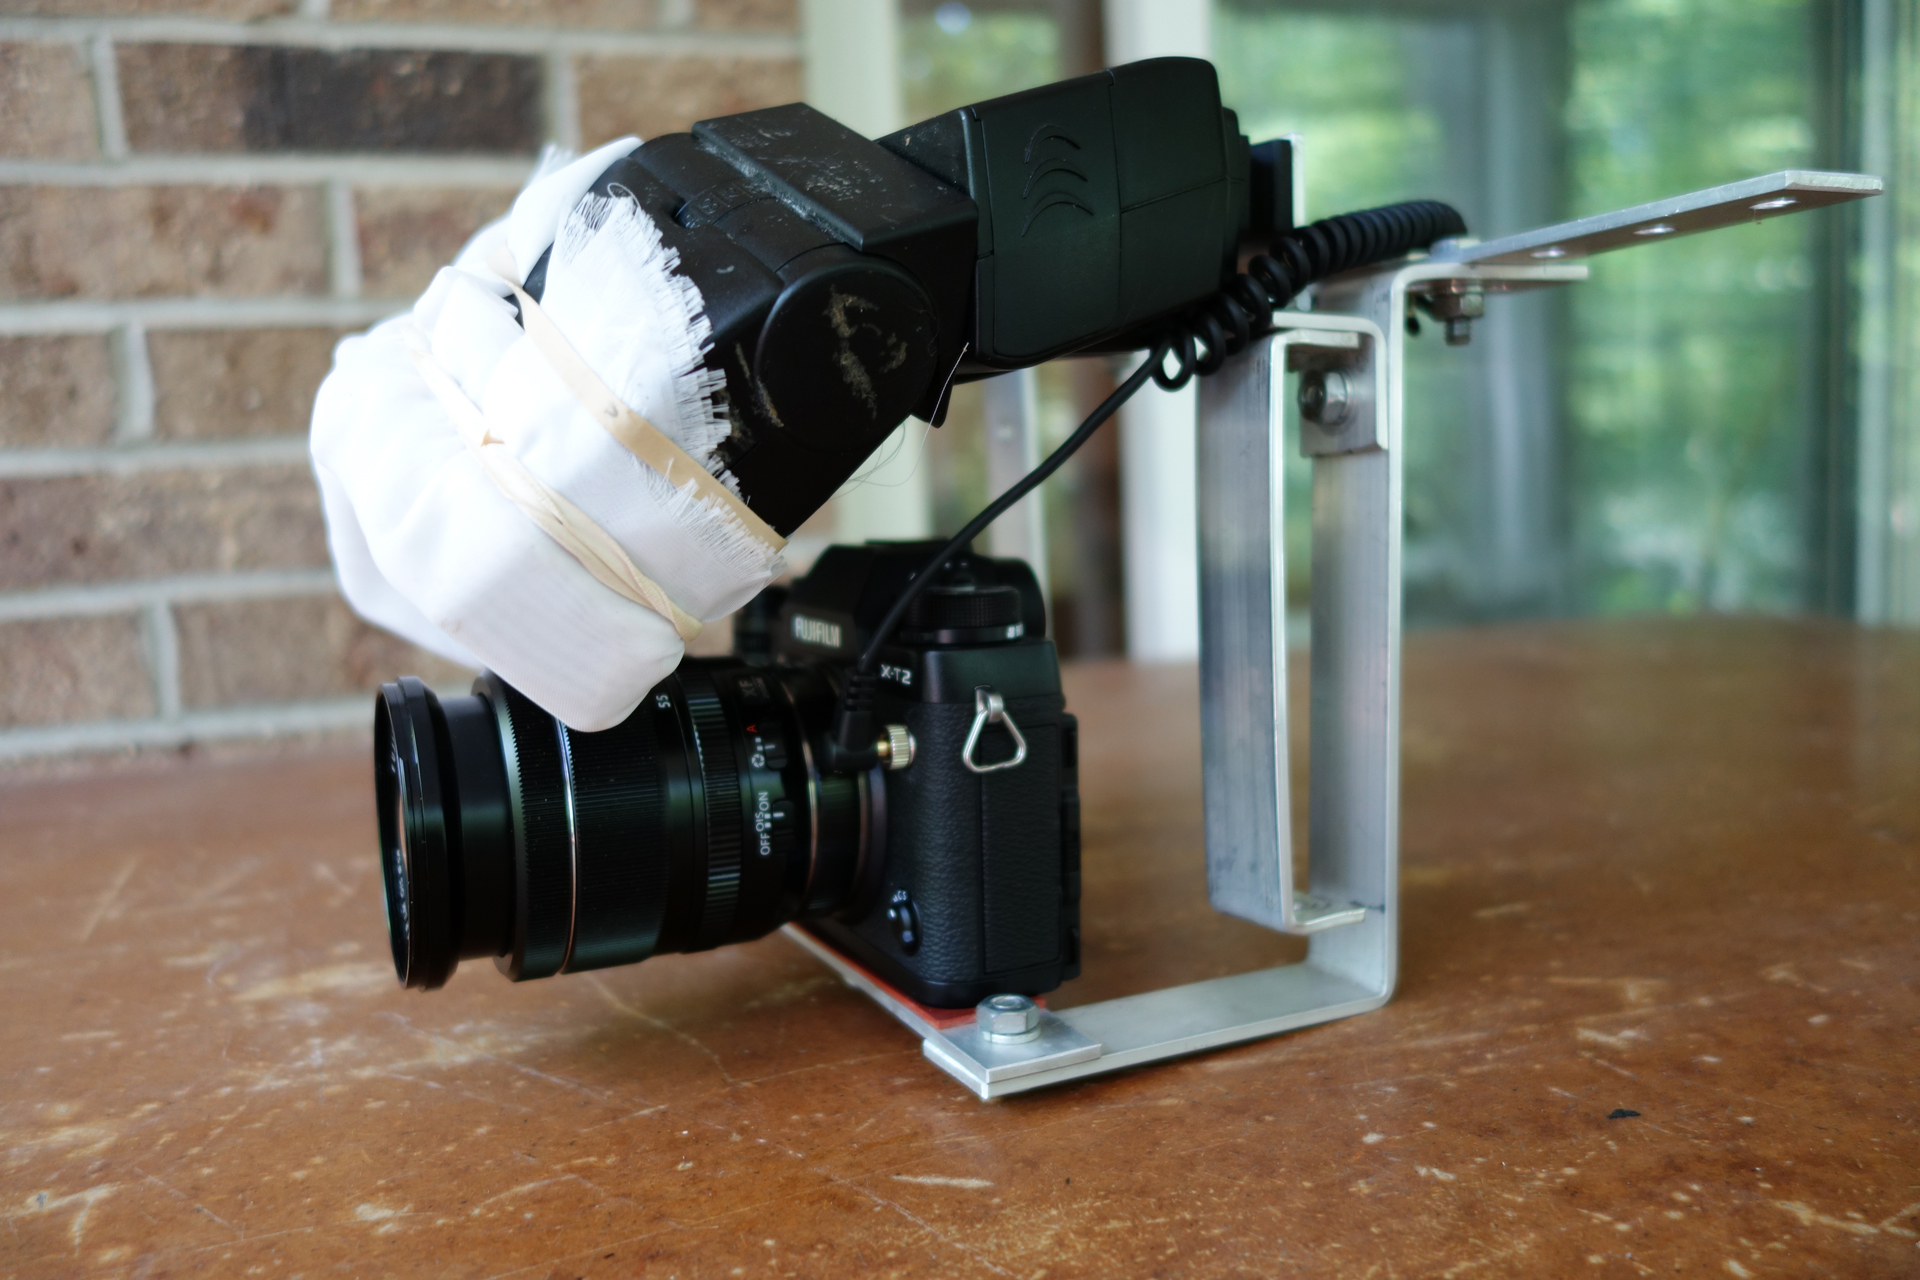
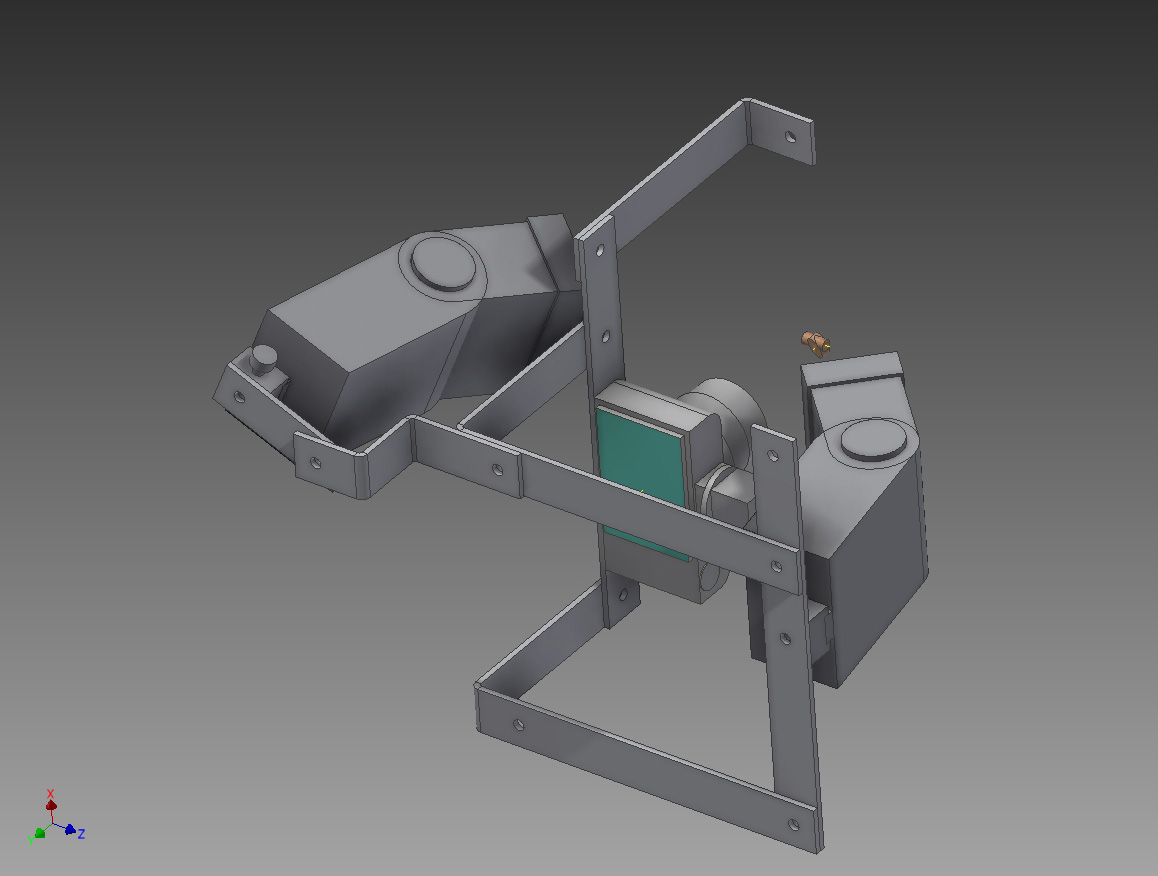
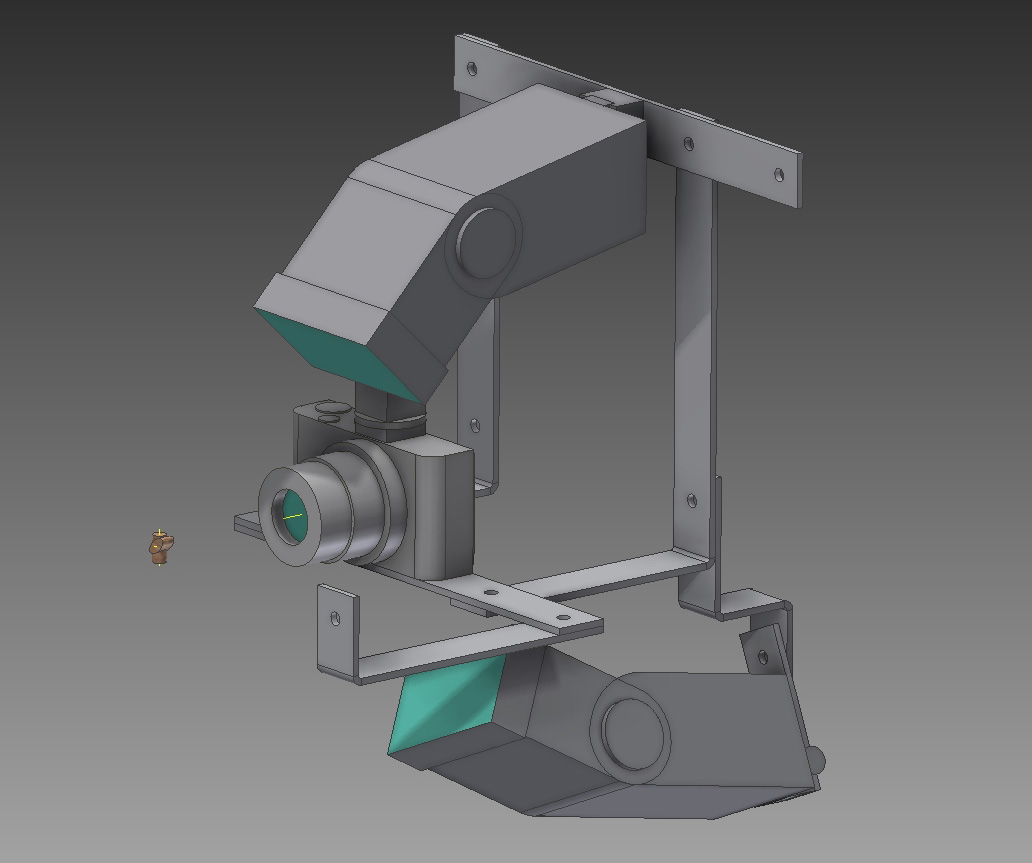
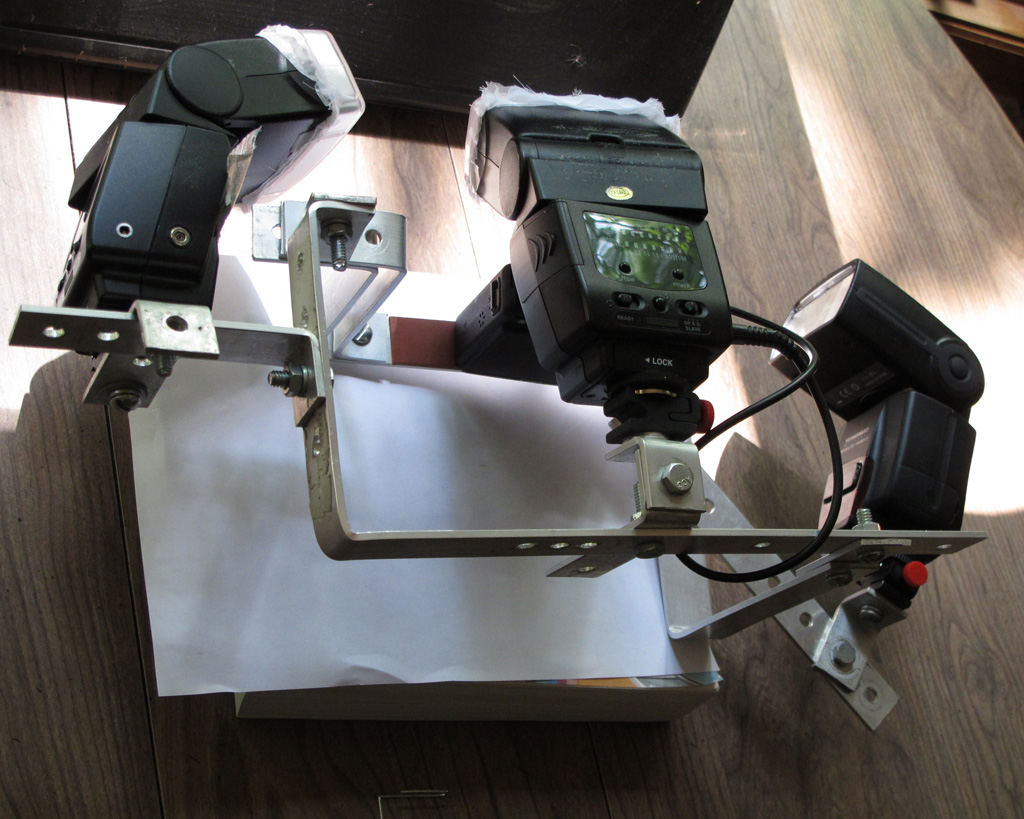
Camera bracket 2020. After you get the basic idea, the quality of the photo is all about the lighting. I made a camera bracket to move the flash off the hotshoe and add a second flash. One flash fires from an adapter on the hotshoe (or a port on the camera) and the other is a slave that flashes when it sees the other go off.
The bracket is made from aluminum flat bar, 1 inch by 1/8 inch, cut with a jigsaw, bent with a hammer in a vise, drilled for 1/4 inch bolts.
The bracket has two handles. I have a clear path for my hand to rest on the shutter button and for me to see the barrel and the insect. I am taking the photo vertically to capture the long glow.
I currently (written 2020) use 3 flashes, the two main with reflectors are at 180 degrees to each other, the third is mid way between them, farther away, and aimed at the background, over the head of the subject, but does give some light to it. The reflectors are made with construction paper (white and black) and a lamination machine. The window part is made with tracing paper and lamination. They are cut out, folded, taped and placed over the end of the flash units.
Reflector sketch – the body is made of black construction paper laminated (school type hot laminator). There is a white insert to reflect the light. The window is made from tracing paper laminated. The blue thing is the flash. The aim is to reduce glare and hotspots in the photo, to make the photo look natural and not so obviously a flash picture.
I modified the bracket every year, maybe just the position of the flashes. How can I make the pictures prettier and more natural looking? With cameras with larger lenses, its hard to get the flash around the lens. Fireflies are skittish and don’t like big white reflectors coming towards them, so its not possible to completely optimize the light. Reflectors made a better light and were less intrusive. The 2020 and 2021 are maybe the best photos and this is how they were made.
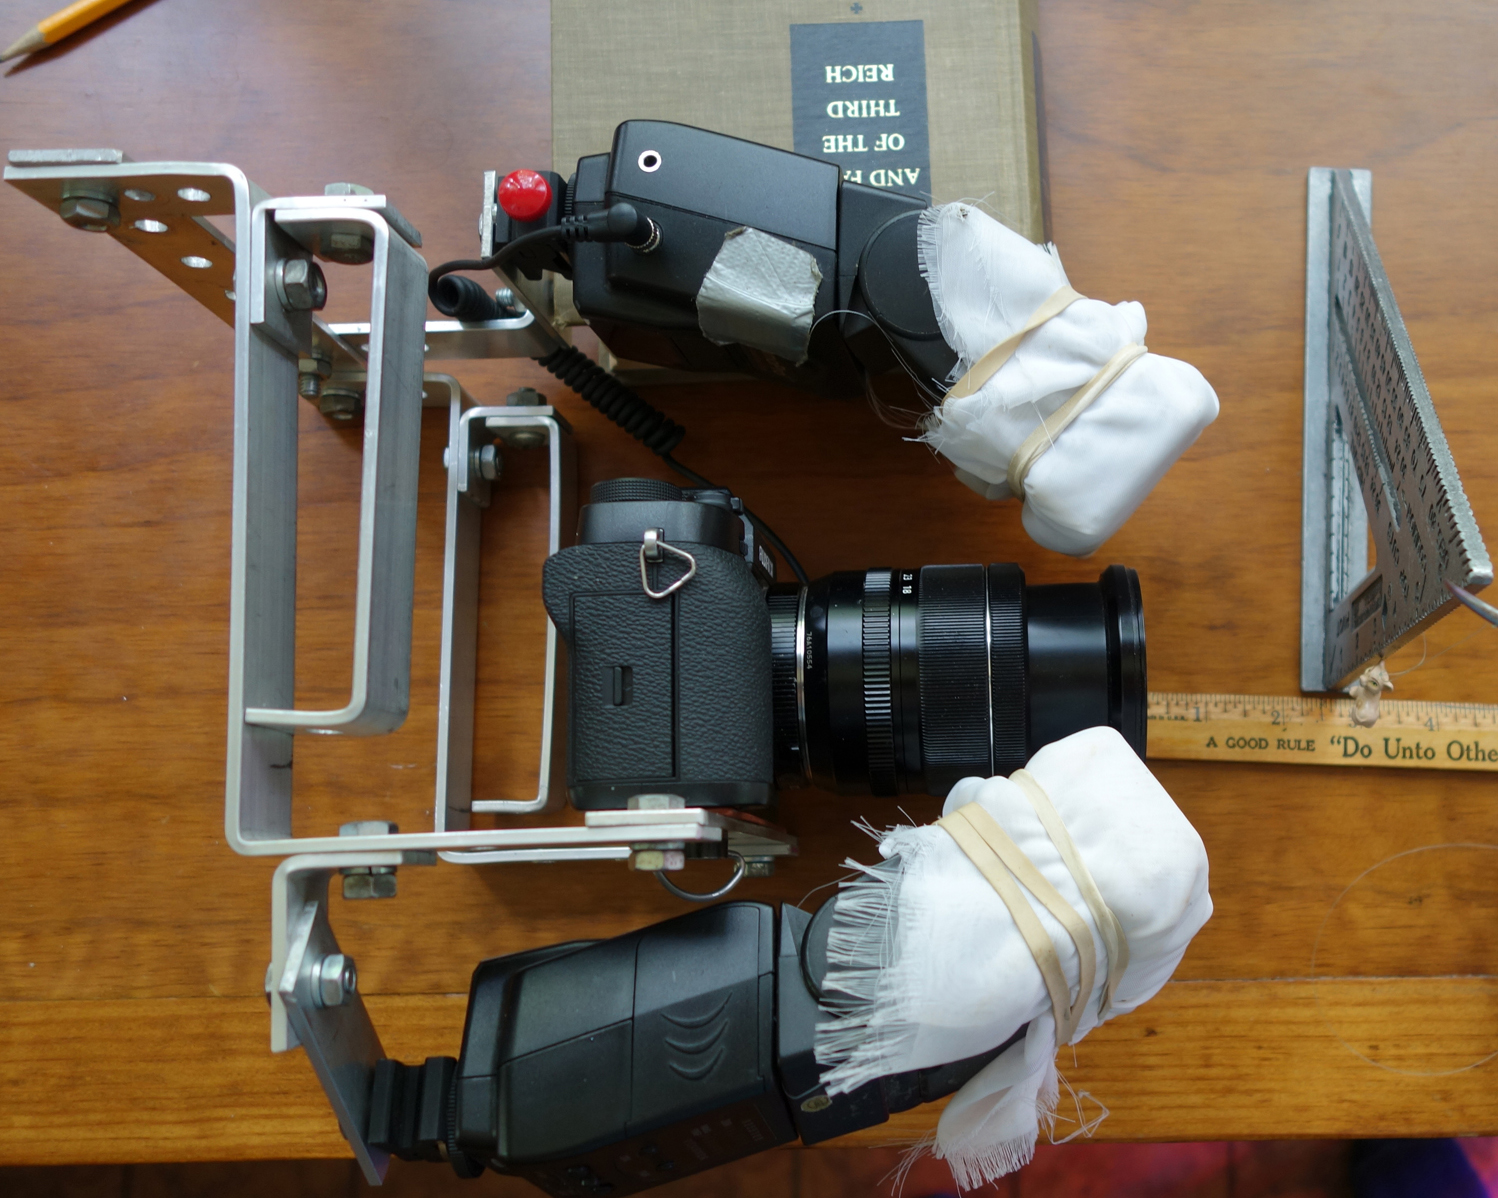
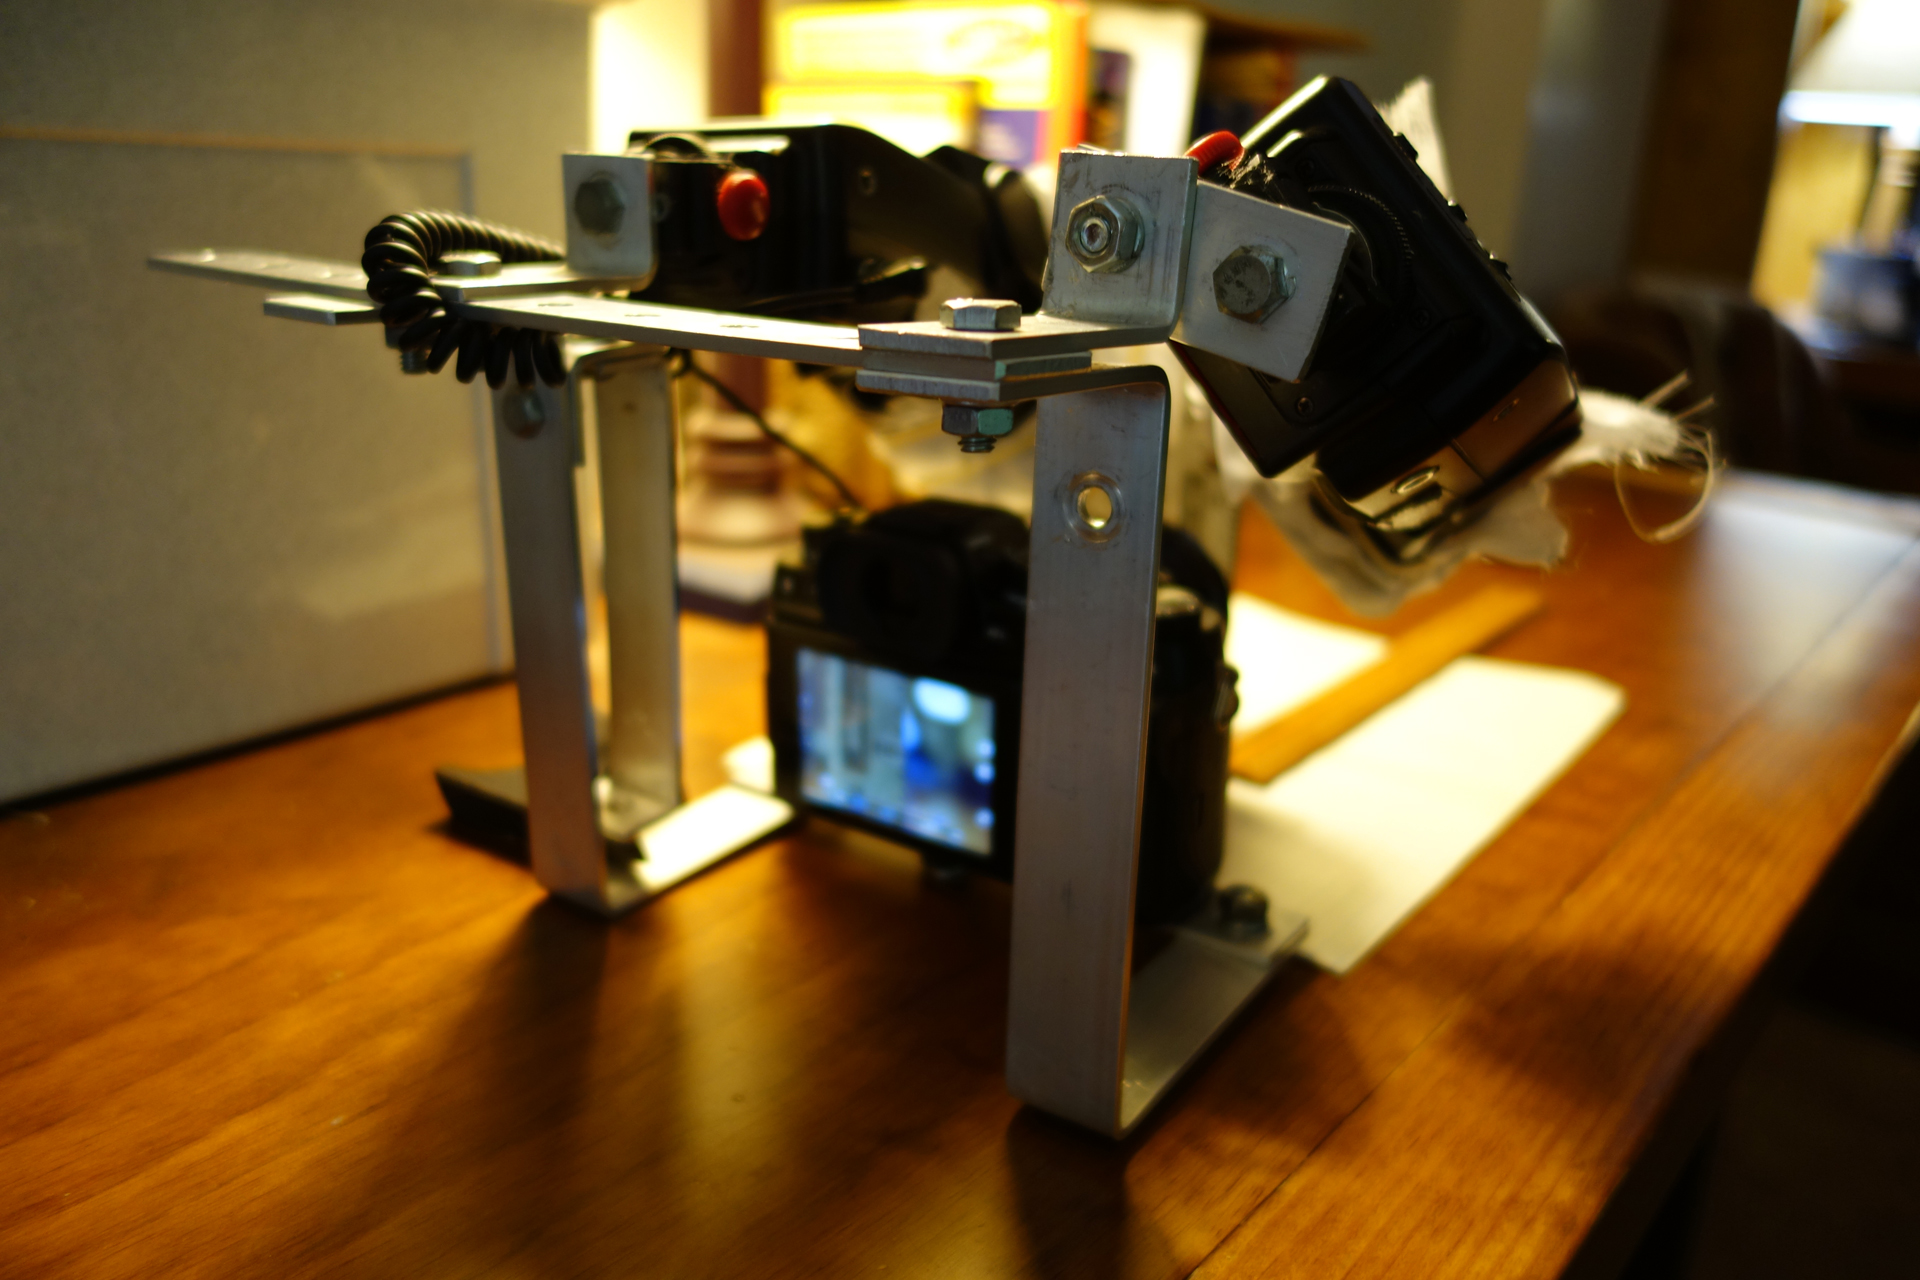
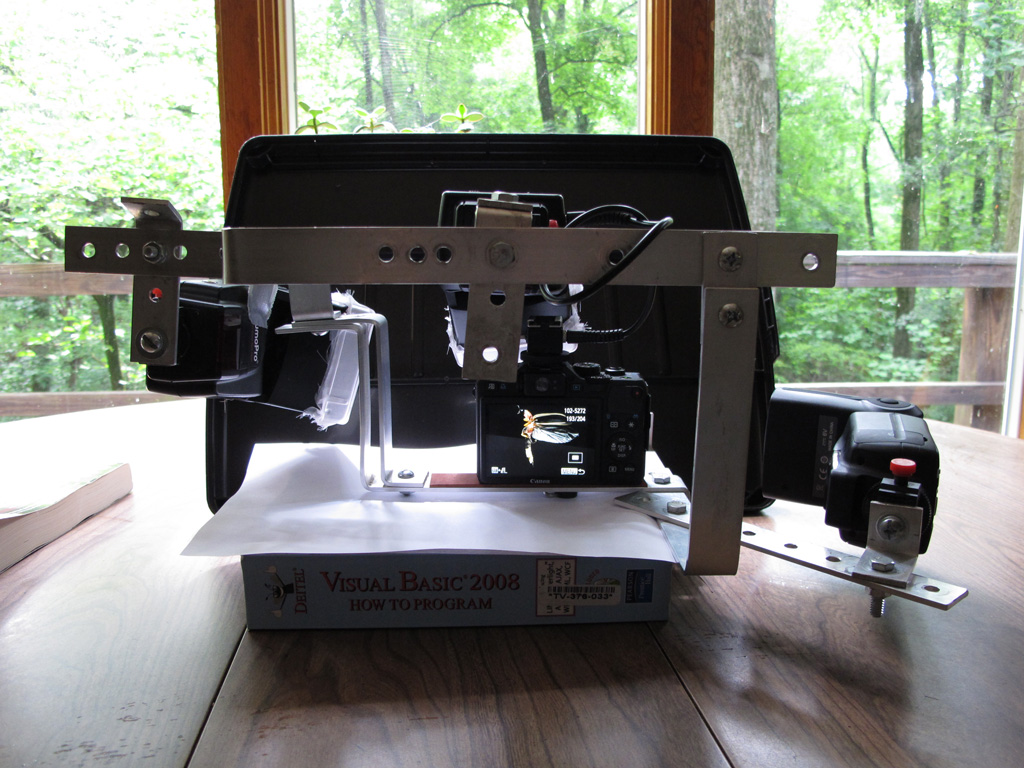
Fuji X-T2, 24 mp, 18-55mm lens, 11mm extension tube
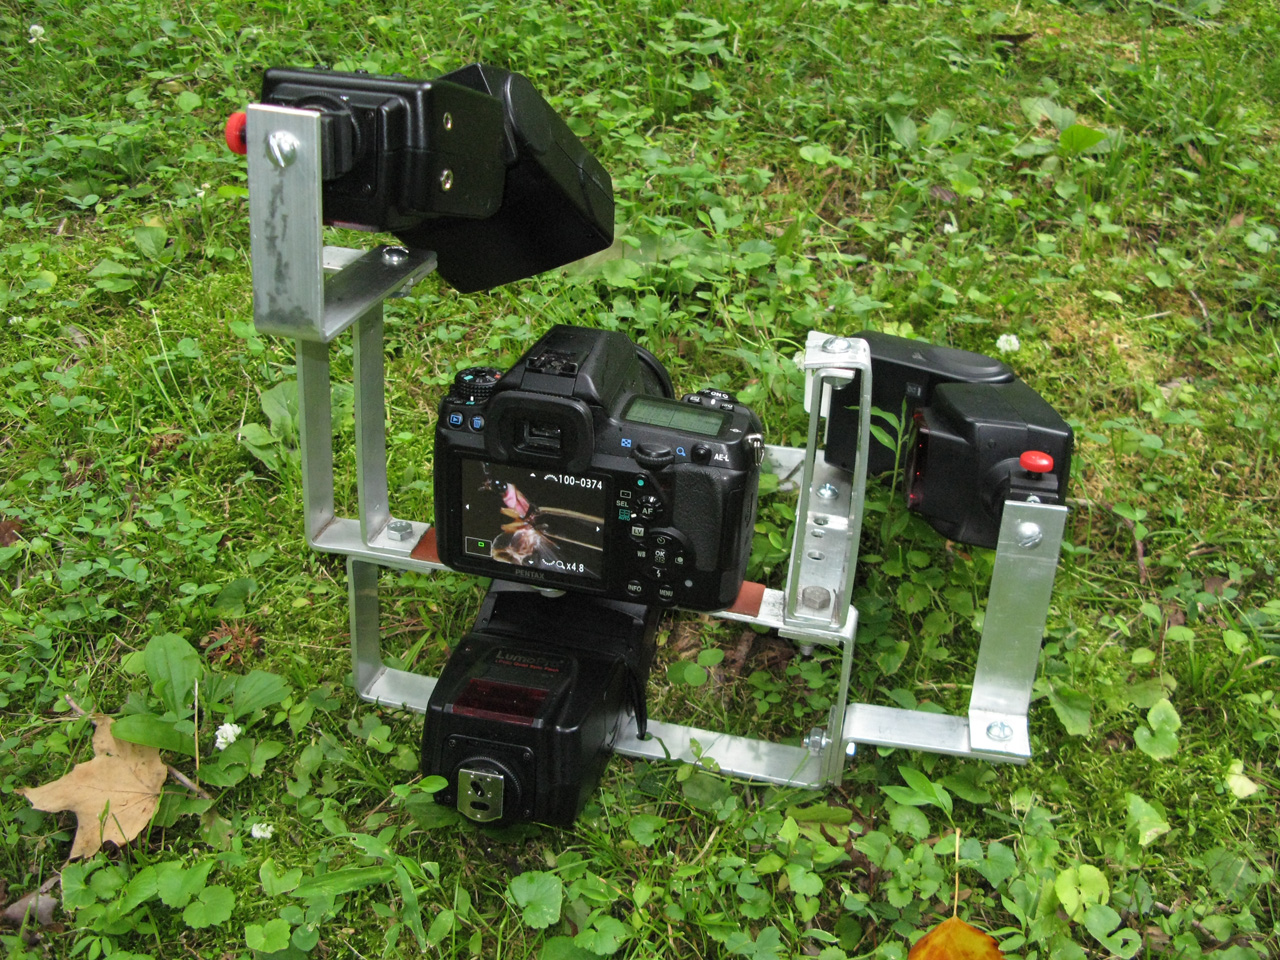
Camera bracket 2019. I have used this basic design for 3 years, but this year (written 2019) has two improvements. I am taking the pictures vertically. The left hand is on the far side handle. The right hand can grasp the camera normally to click the shot. It feels balanced, good support, there is nothing in the way to see both the lens and bug at the same time. The flashes are almost 180 degrees apart, and almost the same distance from the front of the lens. That allows the shot to be taken equally well from left or right side of the bug, whichever way is easier. That's a big improvement from previous years when I set up the camera to ideally take his left side.
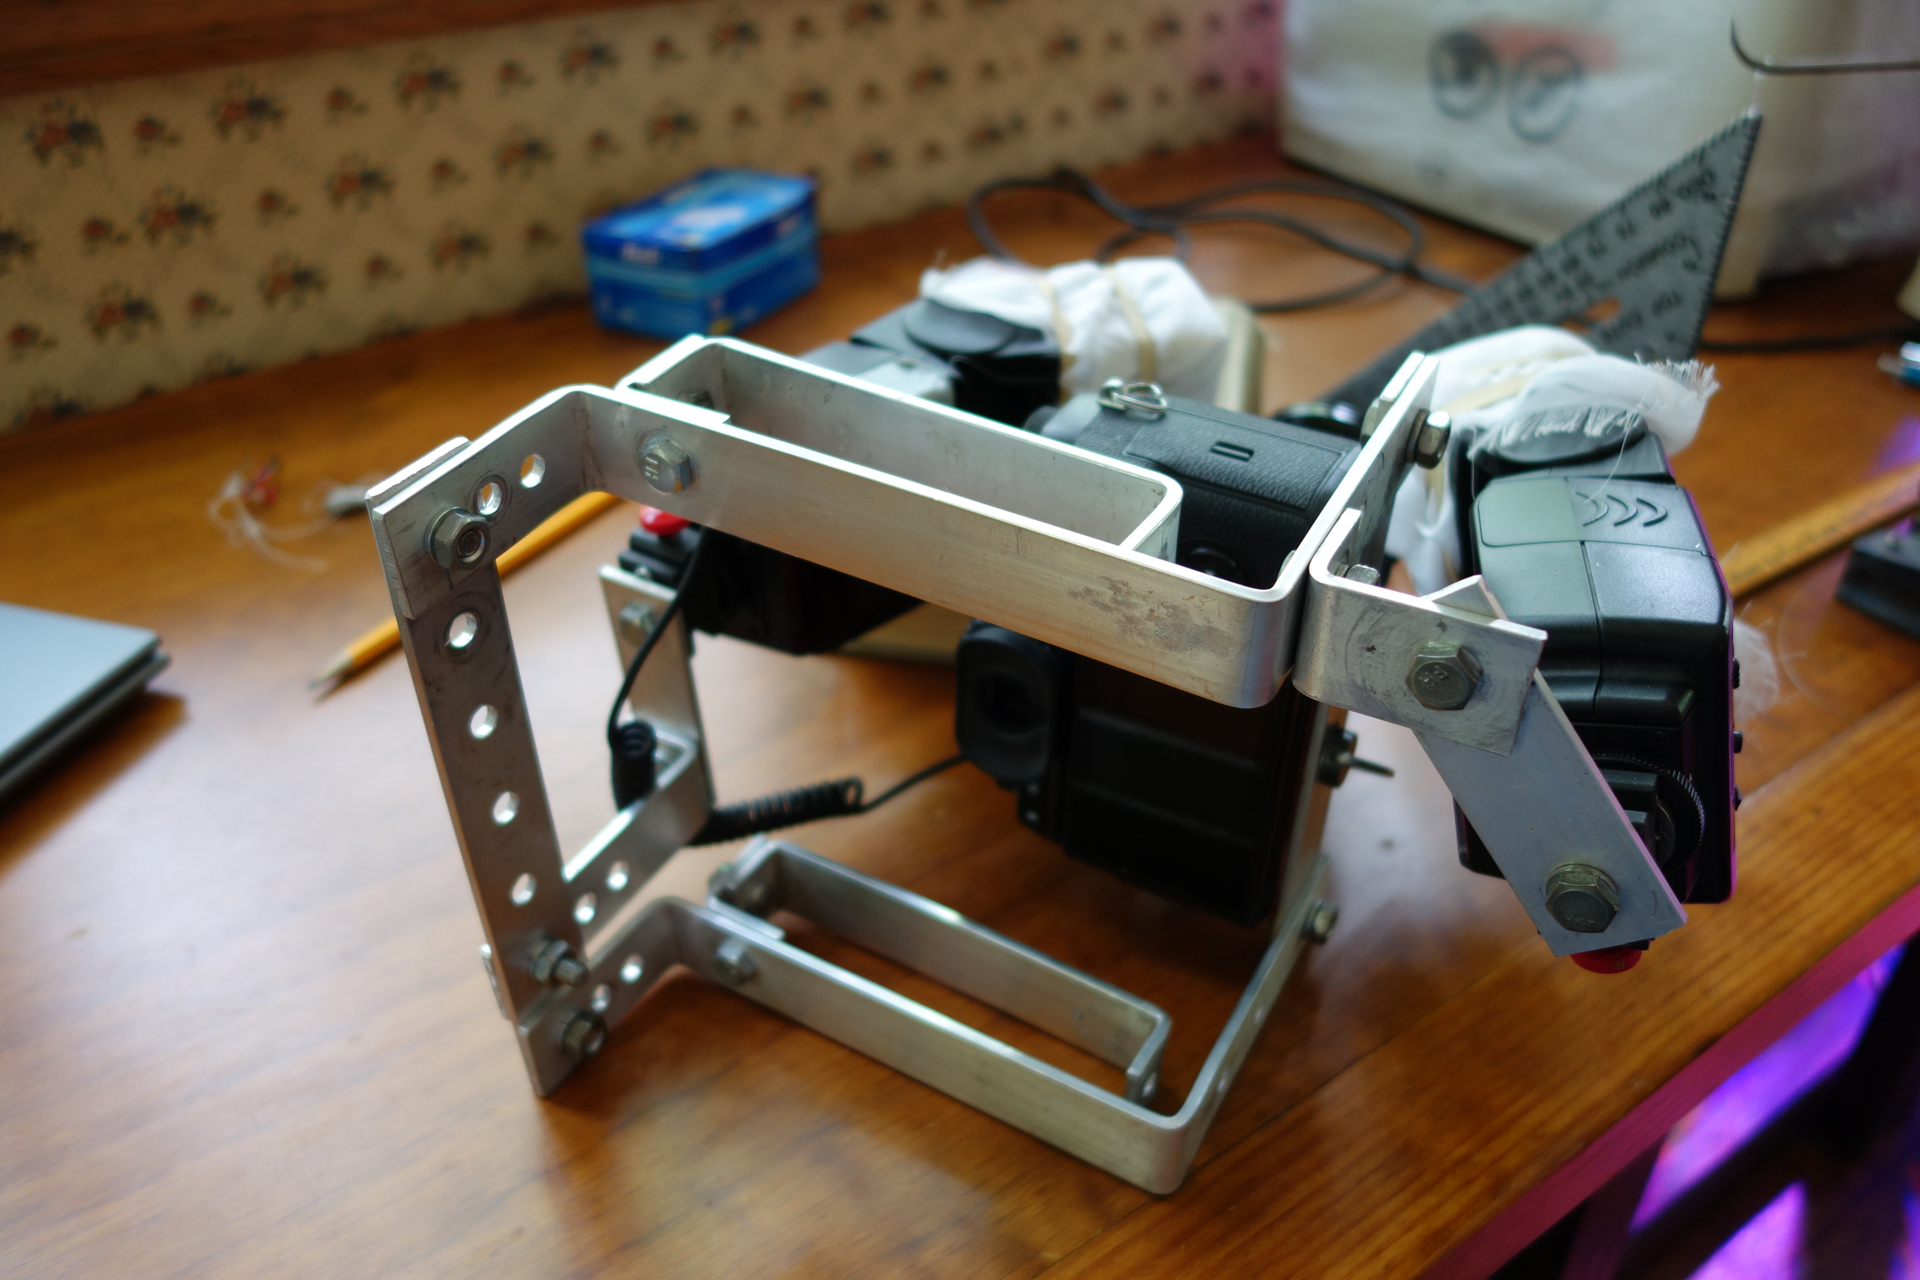
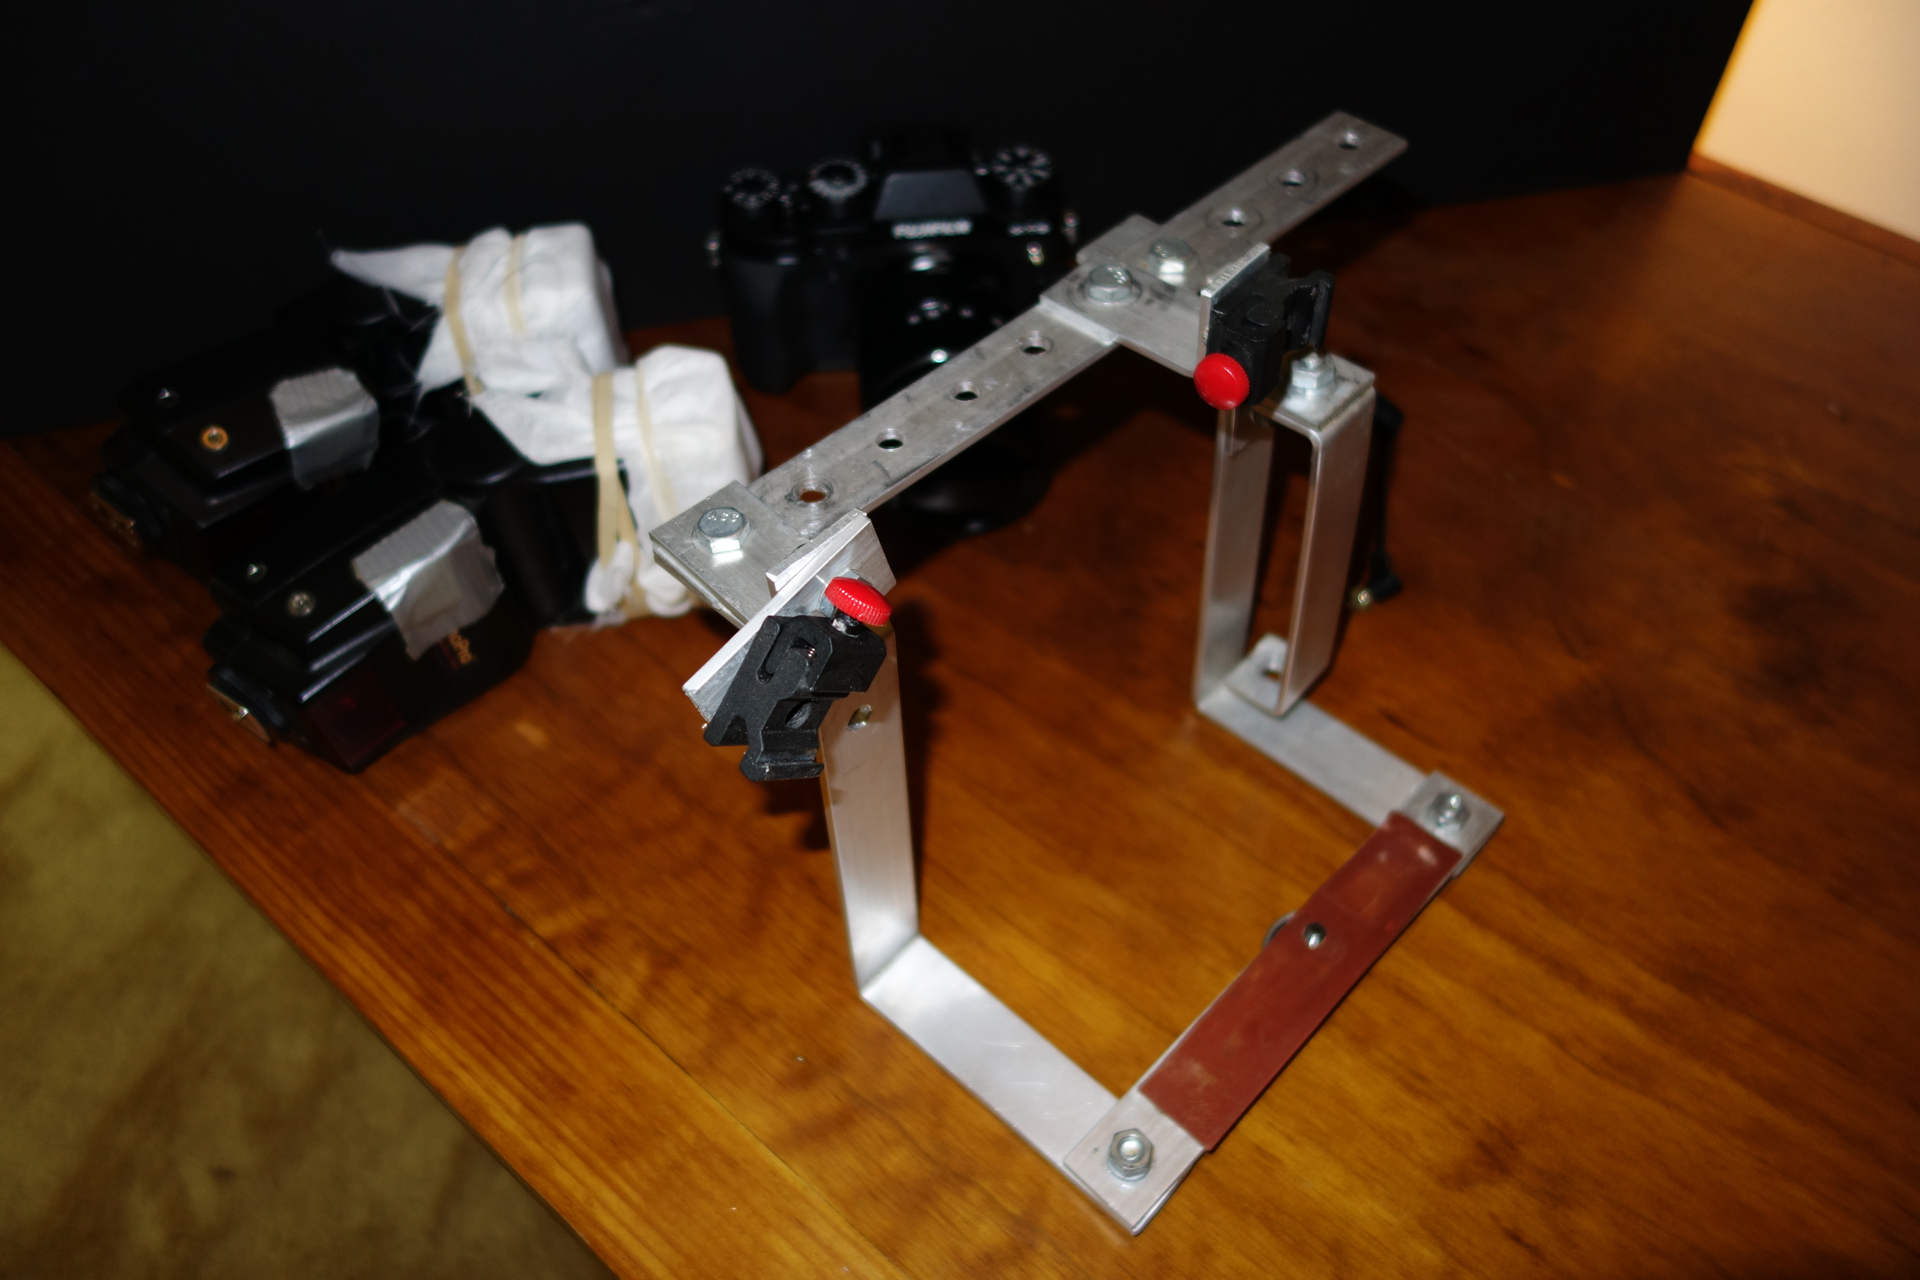
The basic shape I used from 2017 through 2023. There are two identical Z-shape bars, one far and one near, a flat plate for the camera, and the same plate on top. Two handles. Hang the lights wherever you want off that frame.
The material is 1/8 x 1 inch aluminum bar bought at hardware store. I cut with a fine blade, a coarse metal blade (not too fine), on a saber saw. Measure, mark and bend with a ball peen in a vise. All screws are 1/4 inch. Holes are drilled out 1/32 over 1/4. I use lock washers everywhere. It's very strong and does not shift. Use bolts not screws to get two wrenches for final tightening.
I use a Fuji XT2, with a kit lens 18-55 mm. That won't focus close enough so I use an extension tube MCX-11. I have used about 6 different cameras and all of them have worked. Compact cameras actually work better but the Canon G series I had all had a shutter lag when the hot shoe was used.
I wanted to start out taking pictures with the bug about 3.5 inches in front of the lens. There are a lot of reasons why thats a good idea, but I could not get that space dialed in to my brain and I could not consistently get the bug in focus out that far. Eventually I settled on 2.5 inches, as shown here.
One flash is on a wire and the other is a slave - it fires when it sees light. It's never been set off by a firefly though.
To get the glow of the firefly, I set the shutter to 1/30 second. The flashes are set to their weakest strength, which means they are very fast, about 1/8000 second, maybe. The fast flash freezes the bug and the slow shutter catches his trail. The Fuji has a setting (rear curtain sync) so the flash fires near the end of the shutter opening, which means the glow trails the insect, a nice look, better than being out in front of him.

Fuji X-T2, 24 mp, 18-55mm lens, 11mm extension tube
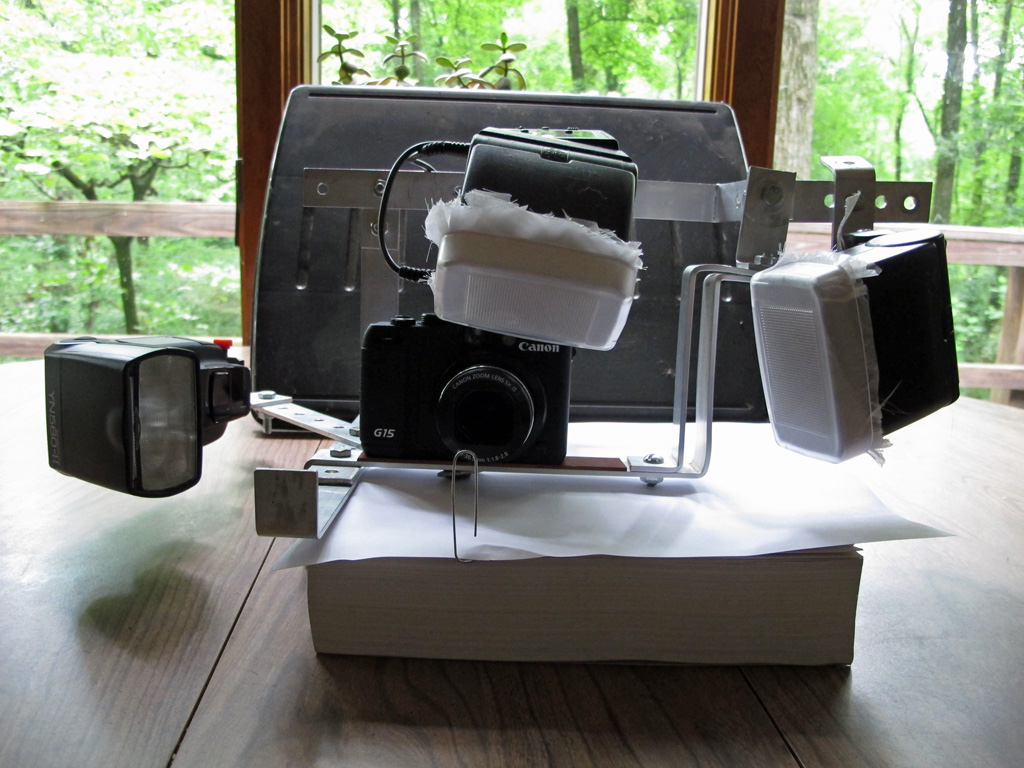
Camera bracket 2018. This is the same bracket I used last year with the addition of the back reflector to give the white background. This was an experiment. I noticed that whenever there was a close background the reflected light made the firefly look more in 3D. It kind of worked, but it made a shadow on their wings, and the pictures I don't think are very good.
There is about 7" between the lens and reflector. The insect is photographed about 2" from the lens. If the reflector is too close the firefly veers straight to it. As long as it was far enough back to not influence his flight, it really wasn't that difficult to get pictures of him. More work may have made better pictures.
Fuji X-T2, 24 mp, 18-55mm lens, 11mm extension tube
Camera bracket 2017
Sony DSC-RX100M2, 20 mp, fixed lens, hot shoe
Camera bracket 2016
A bad, ugly, cobbled together design but the pictures were good.
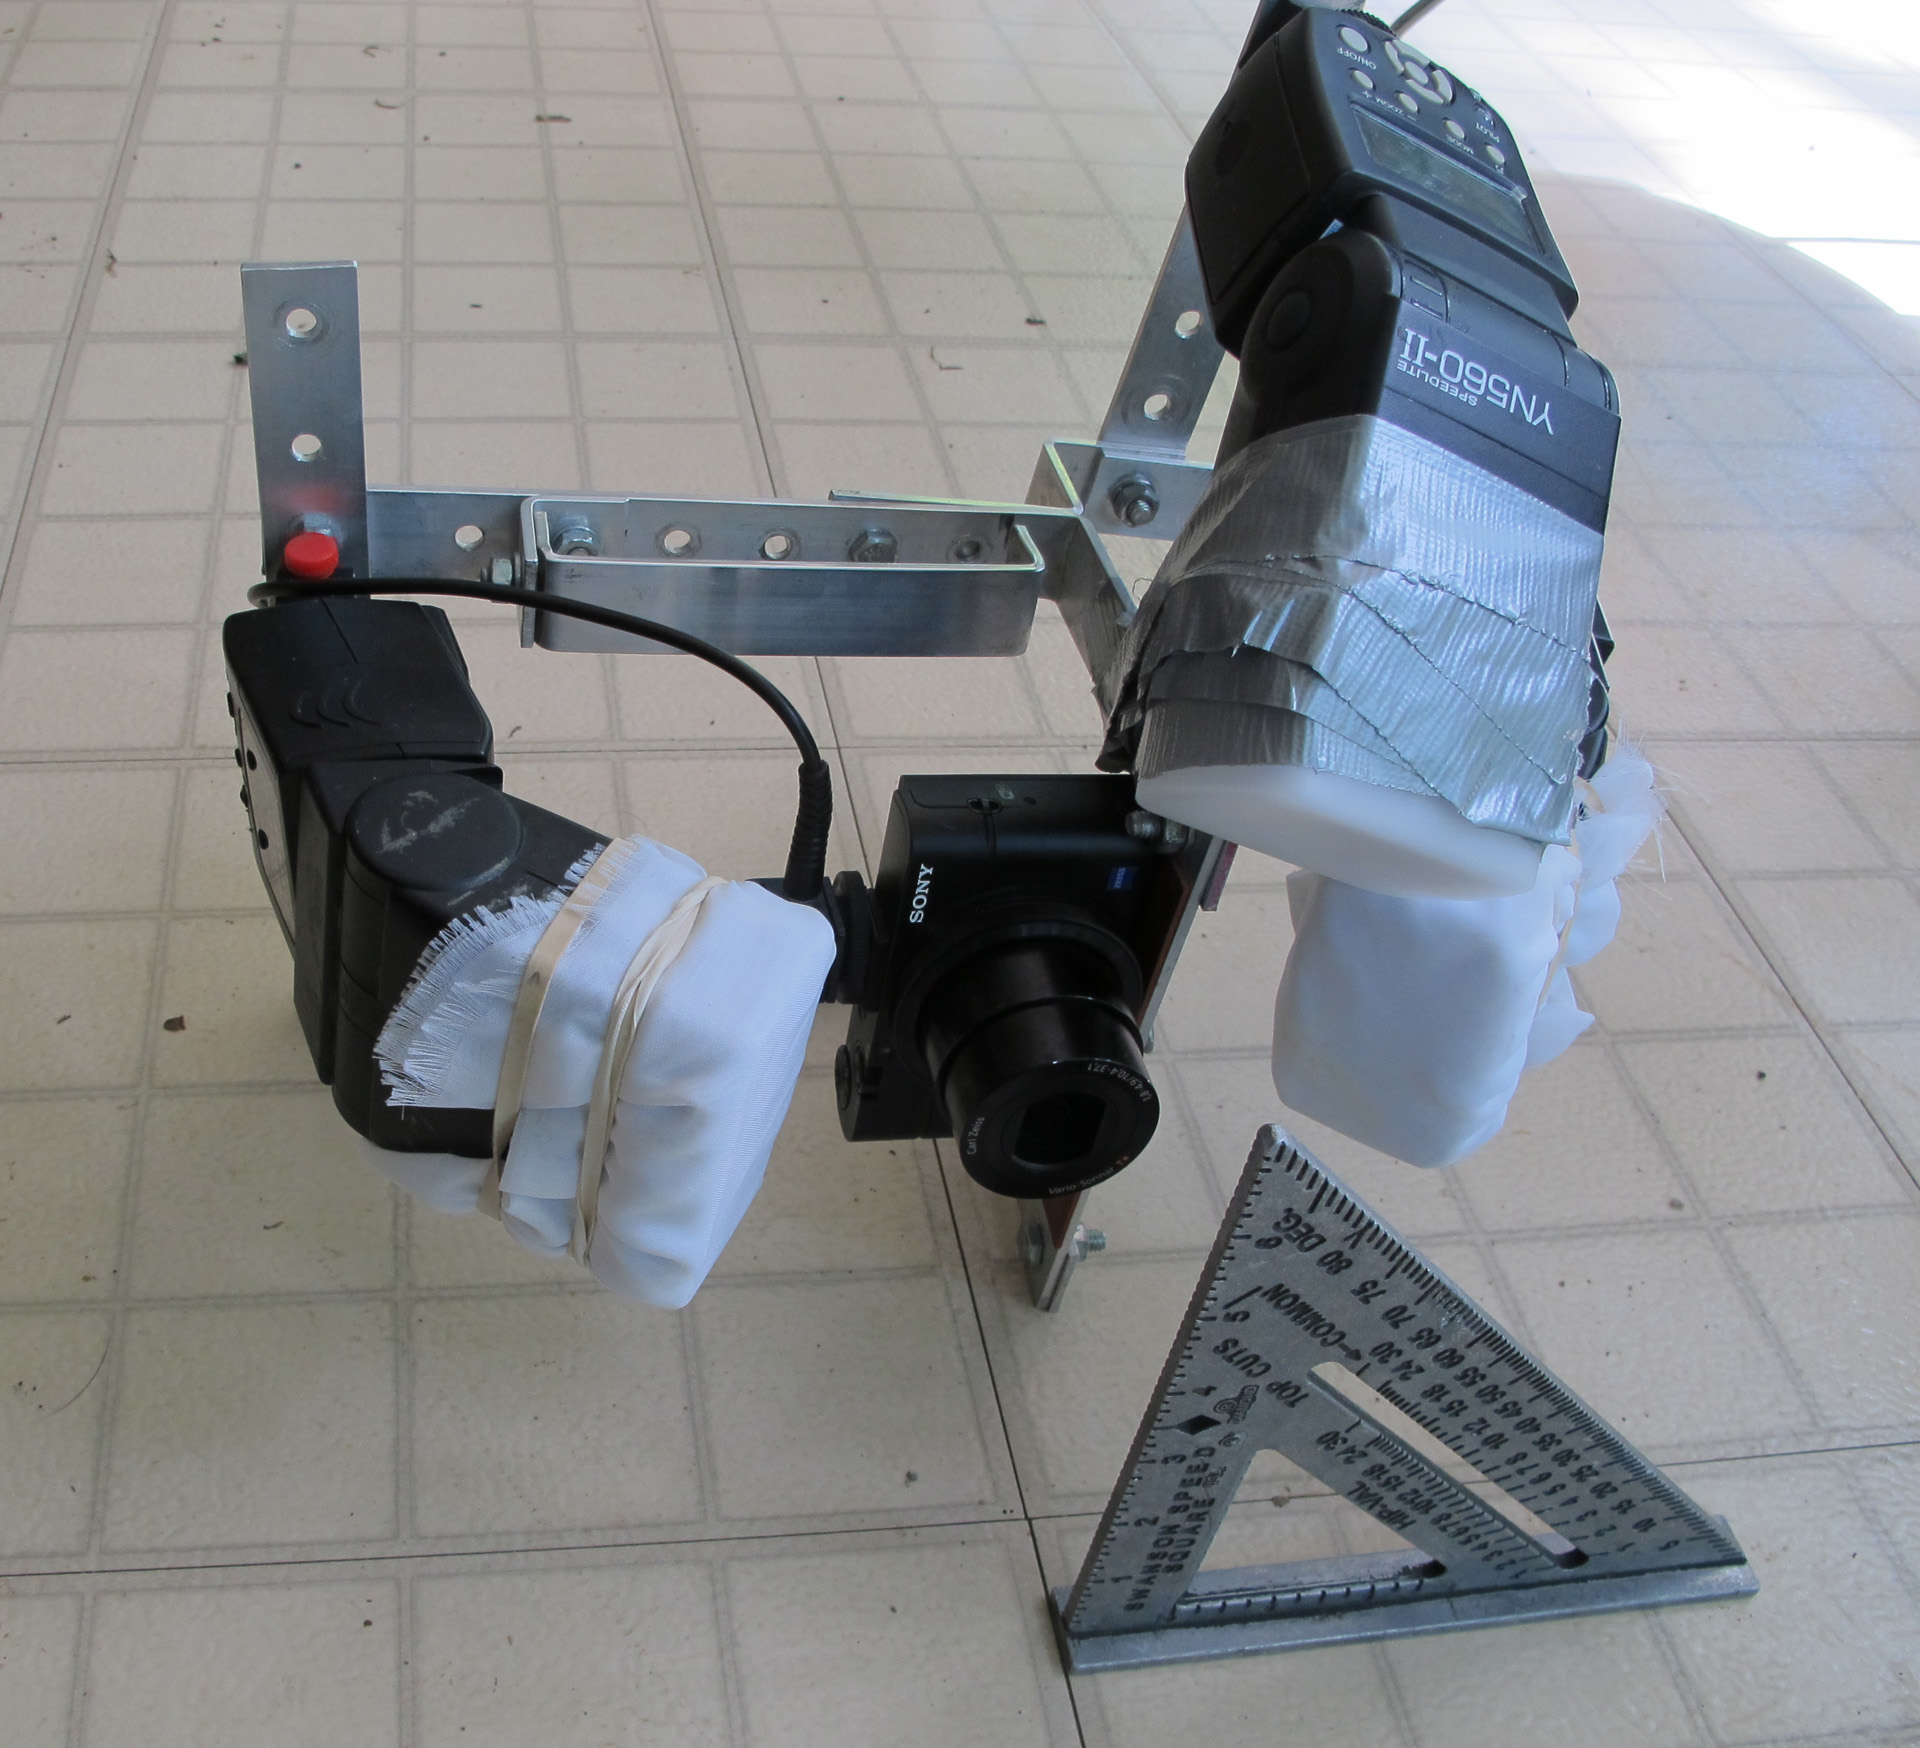
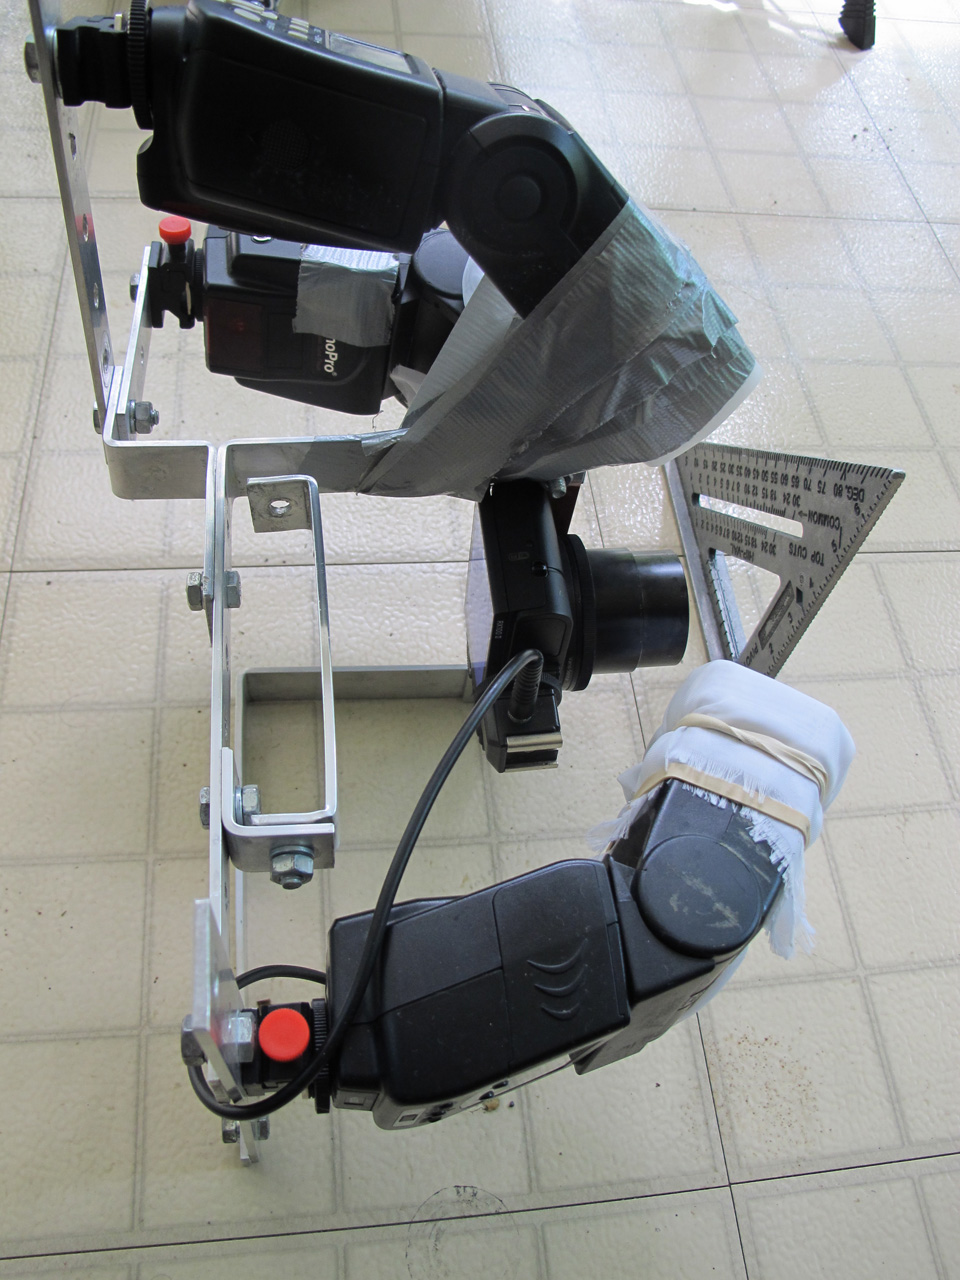
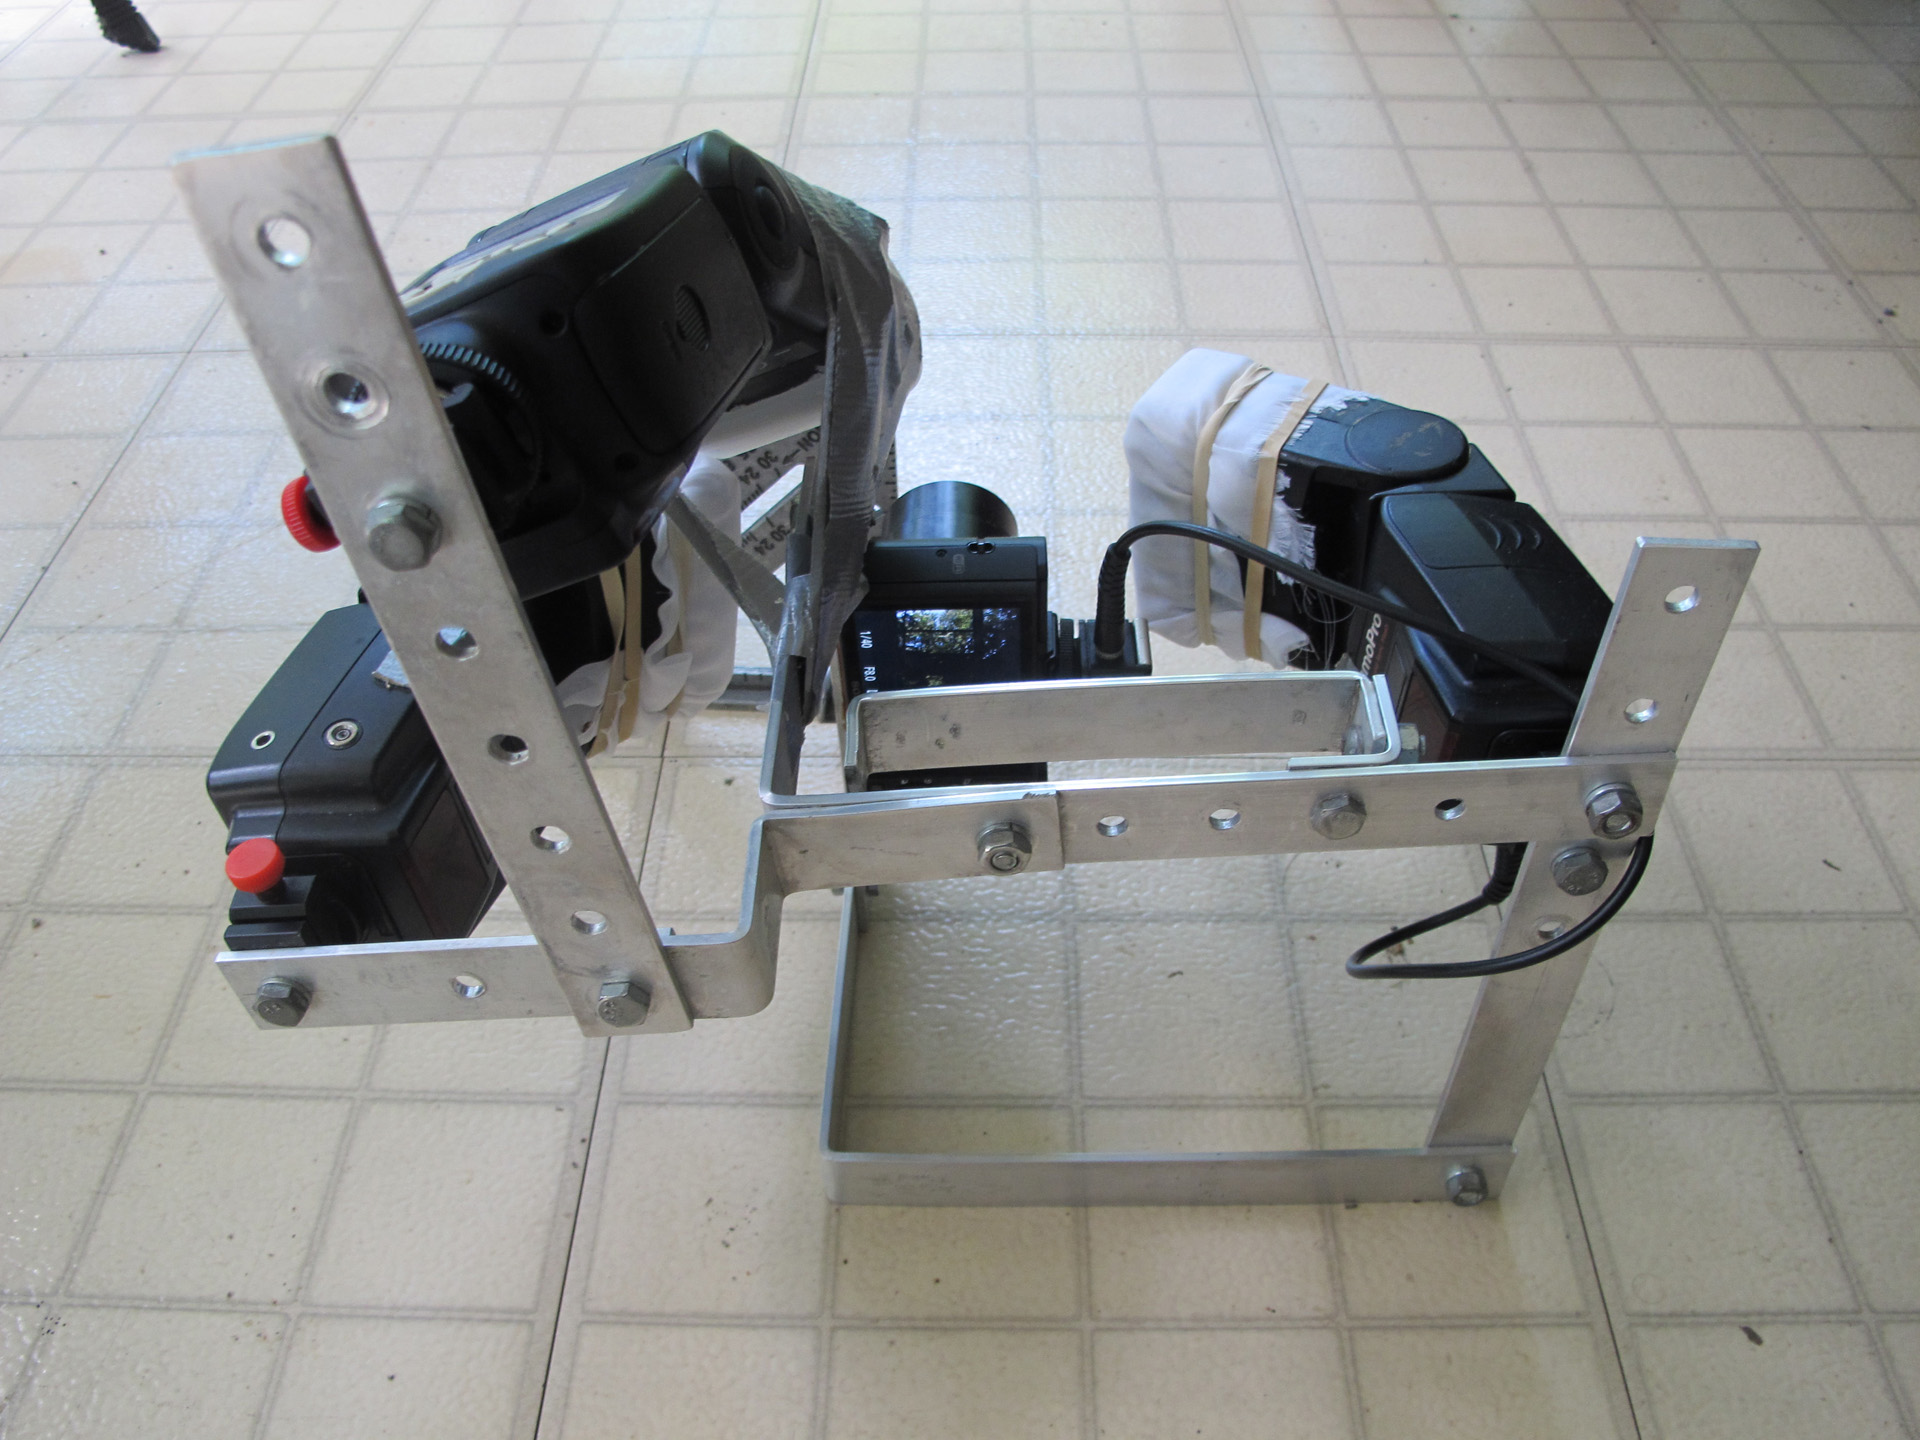
This is the exact same bracket I used last year (written 2016), with the addition of a third flash. i just added this back straight bar in foreground (to the right). The equipment is same as last year. The new flash is a Yongnuo YN560, perfectly good, but it does not have the exact positioning of the head like the Lumo-pro. I began taping it in place, then add more tape when that stretches.
The third flash made the photos better. The two Lumo-pro 160 manual flash on the sides (in this picture) were both set at their minimum strength, 1/64th power. The one on top (left here) was closer to the subject and became the main flash, also wired. The other Lumo-pro became the second flash, in power, and the new Yongnuo was set at its minimum 1/128, became the third flash. The results were the photos I have always tried to get where the entire fly is lit up but there are no hot spots. The Yongnuo is about half the price of the Lumo-pro. It's only drawback is that it doesnt have exact positioning. It would not stay where I pointed it so I resorted to duct tape. It also had a LCD that burned through batteries at about twice the rate of the button-only Lumo-pro.
The main flash wired at 1/64 power, the second slave flash farther away also at 1/64, and the new this year third slave flash the same distance as the second at 1/128 power. The handle as discussed last year was a good idea.
You can see the varying effect of the flashes in his eye here Firefly 2016 jpg
Canon G15, 12mp
Sony DSC-RX100M2, 20 mp, hot shoe, very responsive, no noticeable shutter lag.
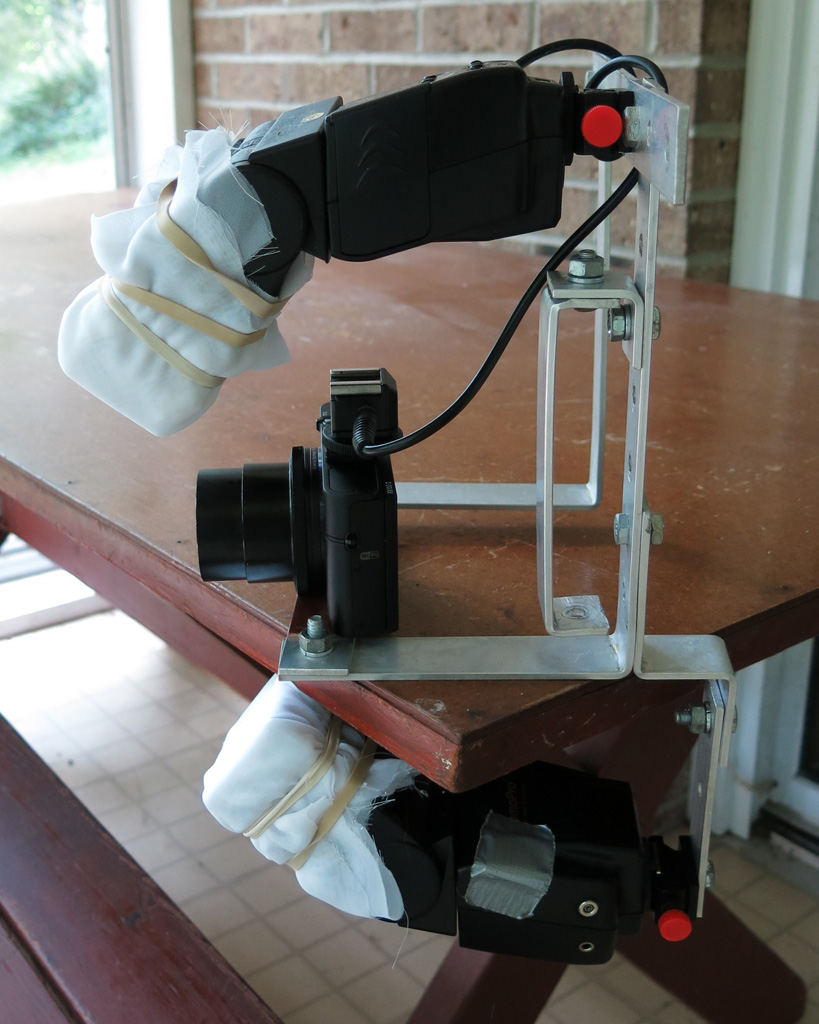
Camera bracket 2015
(2) lumopro 160 manual flash. The top one on a wire off the hot shoe adapter, the bottom one a slave flash. The hand hold behind the camera was a good idea - good control and the hand not out front where it scares the flies. The near side has plenty of room to get my thumb on the shutter button, wrapping my fingers around the horizontal bar for good leverage. My arm can go either inside or outside the vertical bar. The near side is flat, which is very handy for calibrating the focus and testing the effect of the flashes. It sits flat on the floor. The metal is aluminum flat bar 1 inch x 1/8 inch. I cut it with an electric saber saw, using a fine woodworking blade. The screws are all 1/4 inch. Get them with hex heads and short, half inch to 3/4 inch long. Drill the holes just over 1/4 inch. Bend the flat bar by marking, put it in a vise, and bend it over with a ball peen hammer. You can see this design has been modifed from other configurations. Experiment. You have to be comfortable holding and shooting.
I made the bar the camera sits on for a different camera that had the tripod hole in a different place. For this camera, the shutter side was too close, I could not get my hand in the right place. Pretty important to have the shutter hand comfortable. So I turned it around, and had enough room on the shutter side, but the near side hit the screw. I cannot square up the camera, but it doesnt matter much. I should remake it next year.
Canon G15, 12mp, hot shoe
Camera bracket 2014
The little tab coming forward with nothing attached to it was supposed to be a focus guide. I would take the photo with the firefly facing the other way so it wasn't in front of him. From my 3D modeling days using Autodesk Inventor. I am starting to simplify the basic frame.
Canon G15, 12mp, hot shoe
Camera bracket 2013
These were some good, well lit, sparkly photos, using 3 widely spaced flashes. Awkward looking design, the two sides left and right are not similar. The handhold is in line with the camera, left over from the year before with the much heavier DSLR. Probably was easy to hold but put my hand close to the firefly, scaring him. It has the focus tab sticking out in front on the other side from my hand.
Pentax K-7
Camera bracket 2011
I don't think I ever got the flash quite right on the big camera and big lens. This was the first time I used 3 flashes, and with the big DSLR and lens it felt very heavy.
Canon G7, 10mp, fixed lens, hot shoe flash w/reflector
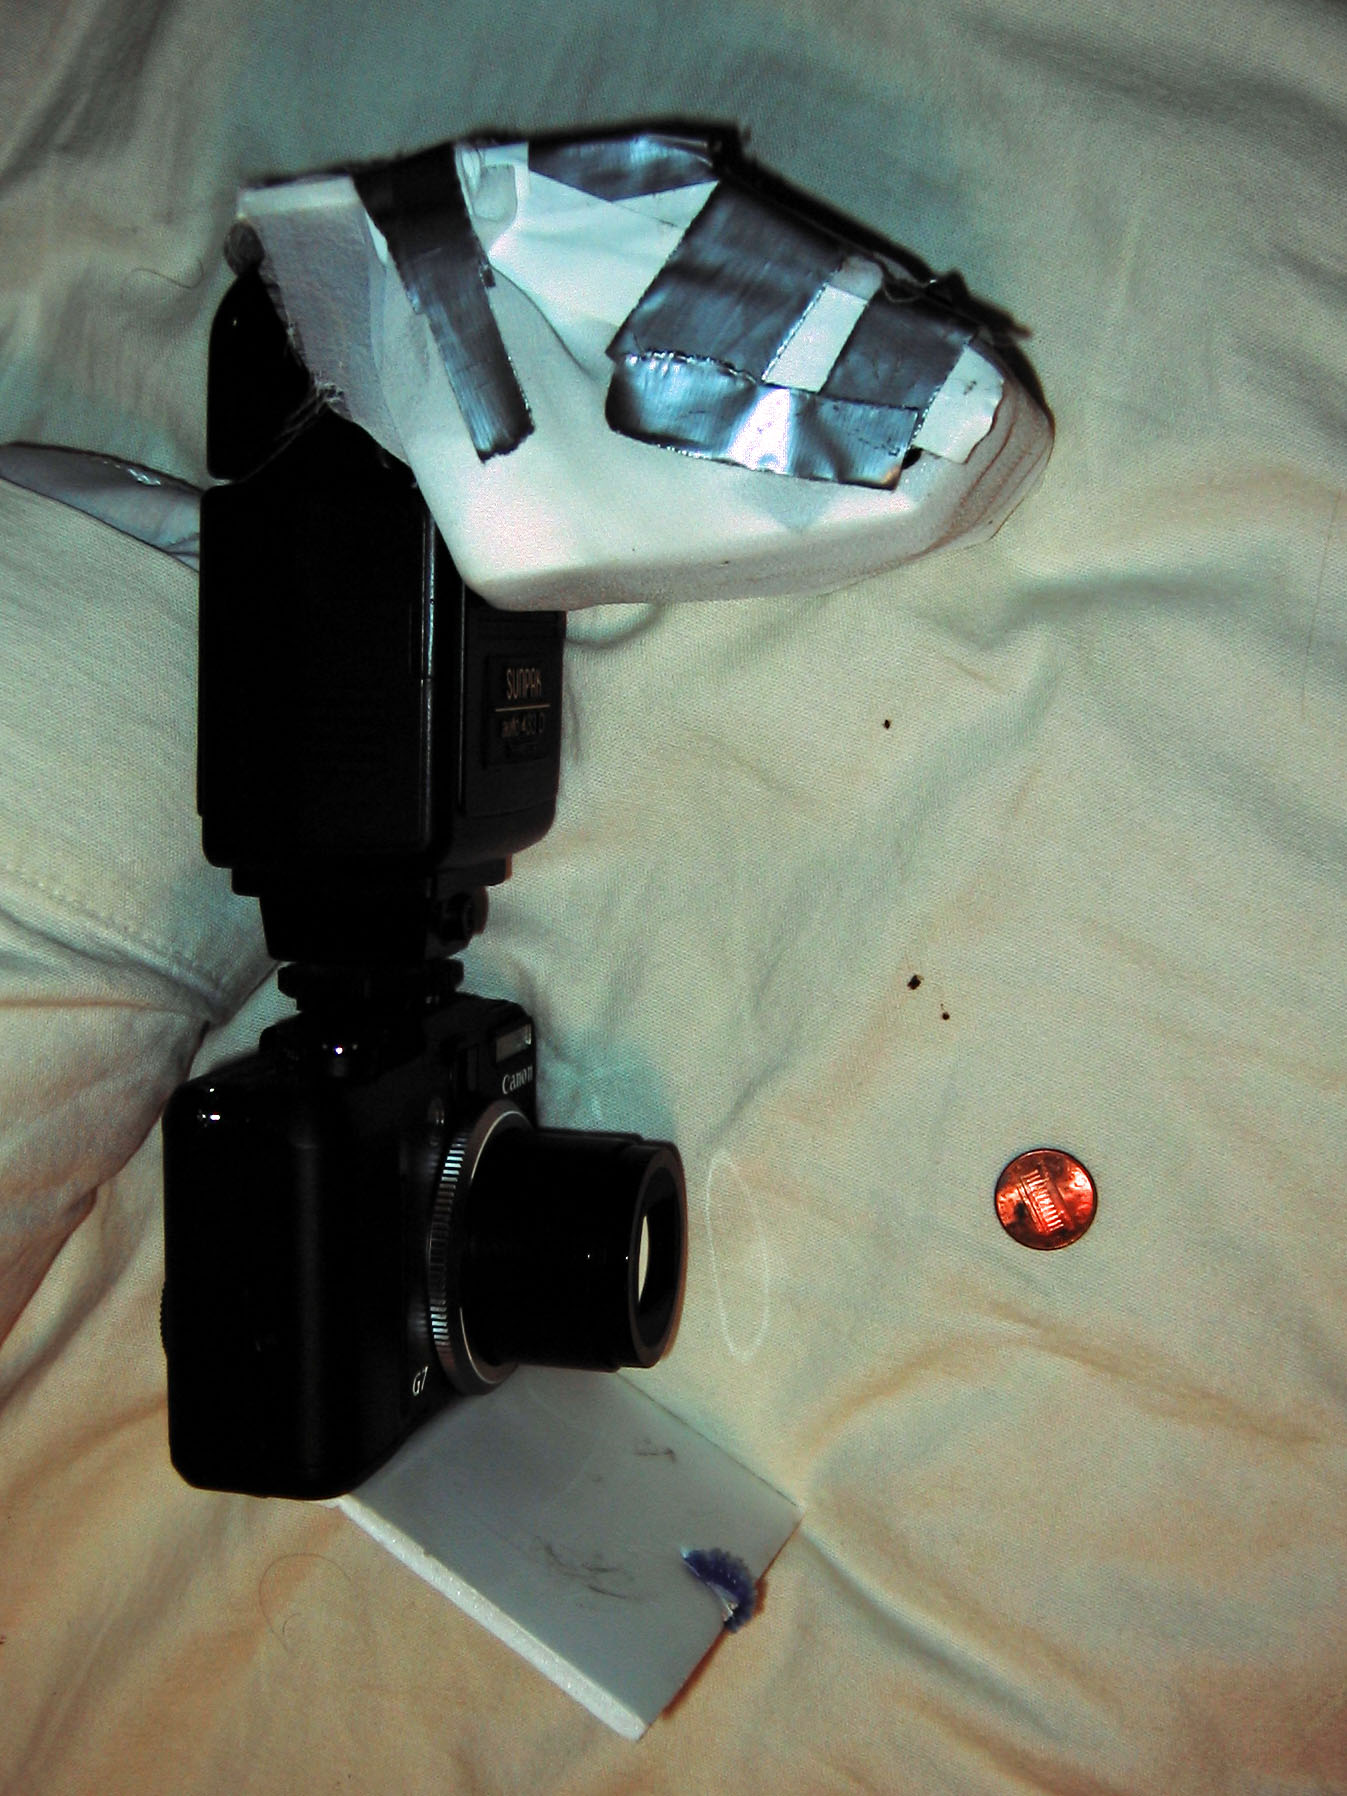
Camera reflector 2009
The fixed focus is where the penny is, straight down from the end of the hood. The hood provides a visual cue where the focus on the firefly should be. The white plate on the bottom is a reflector. It's white styrofoam board. I have it pinched under the quick release tripod plate. I am not sure how many photos actually used that.
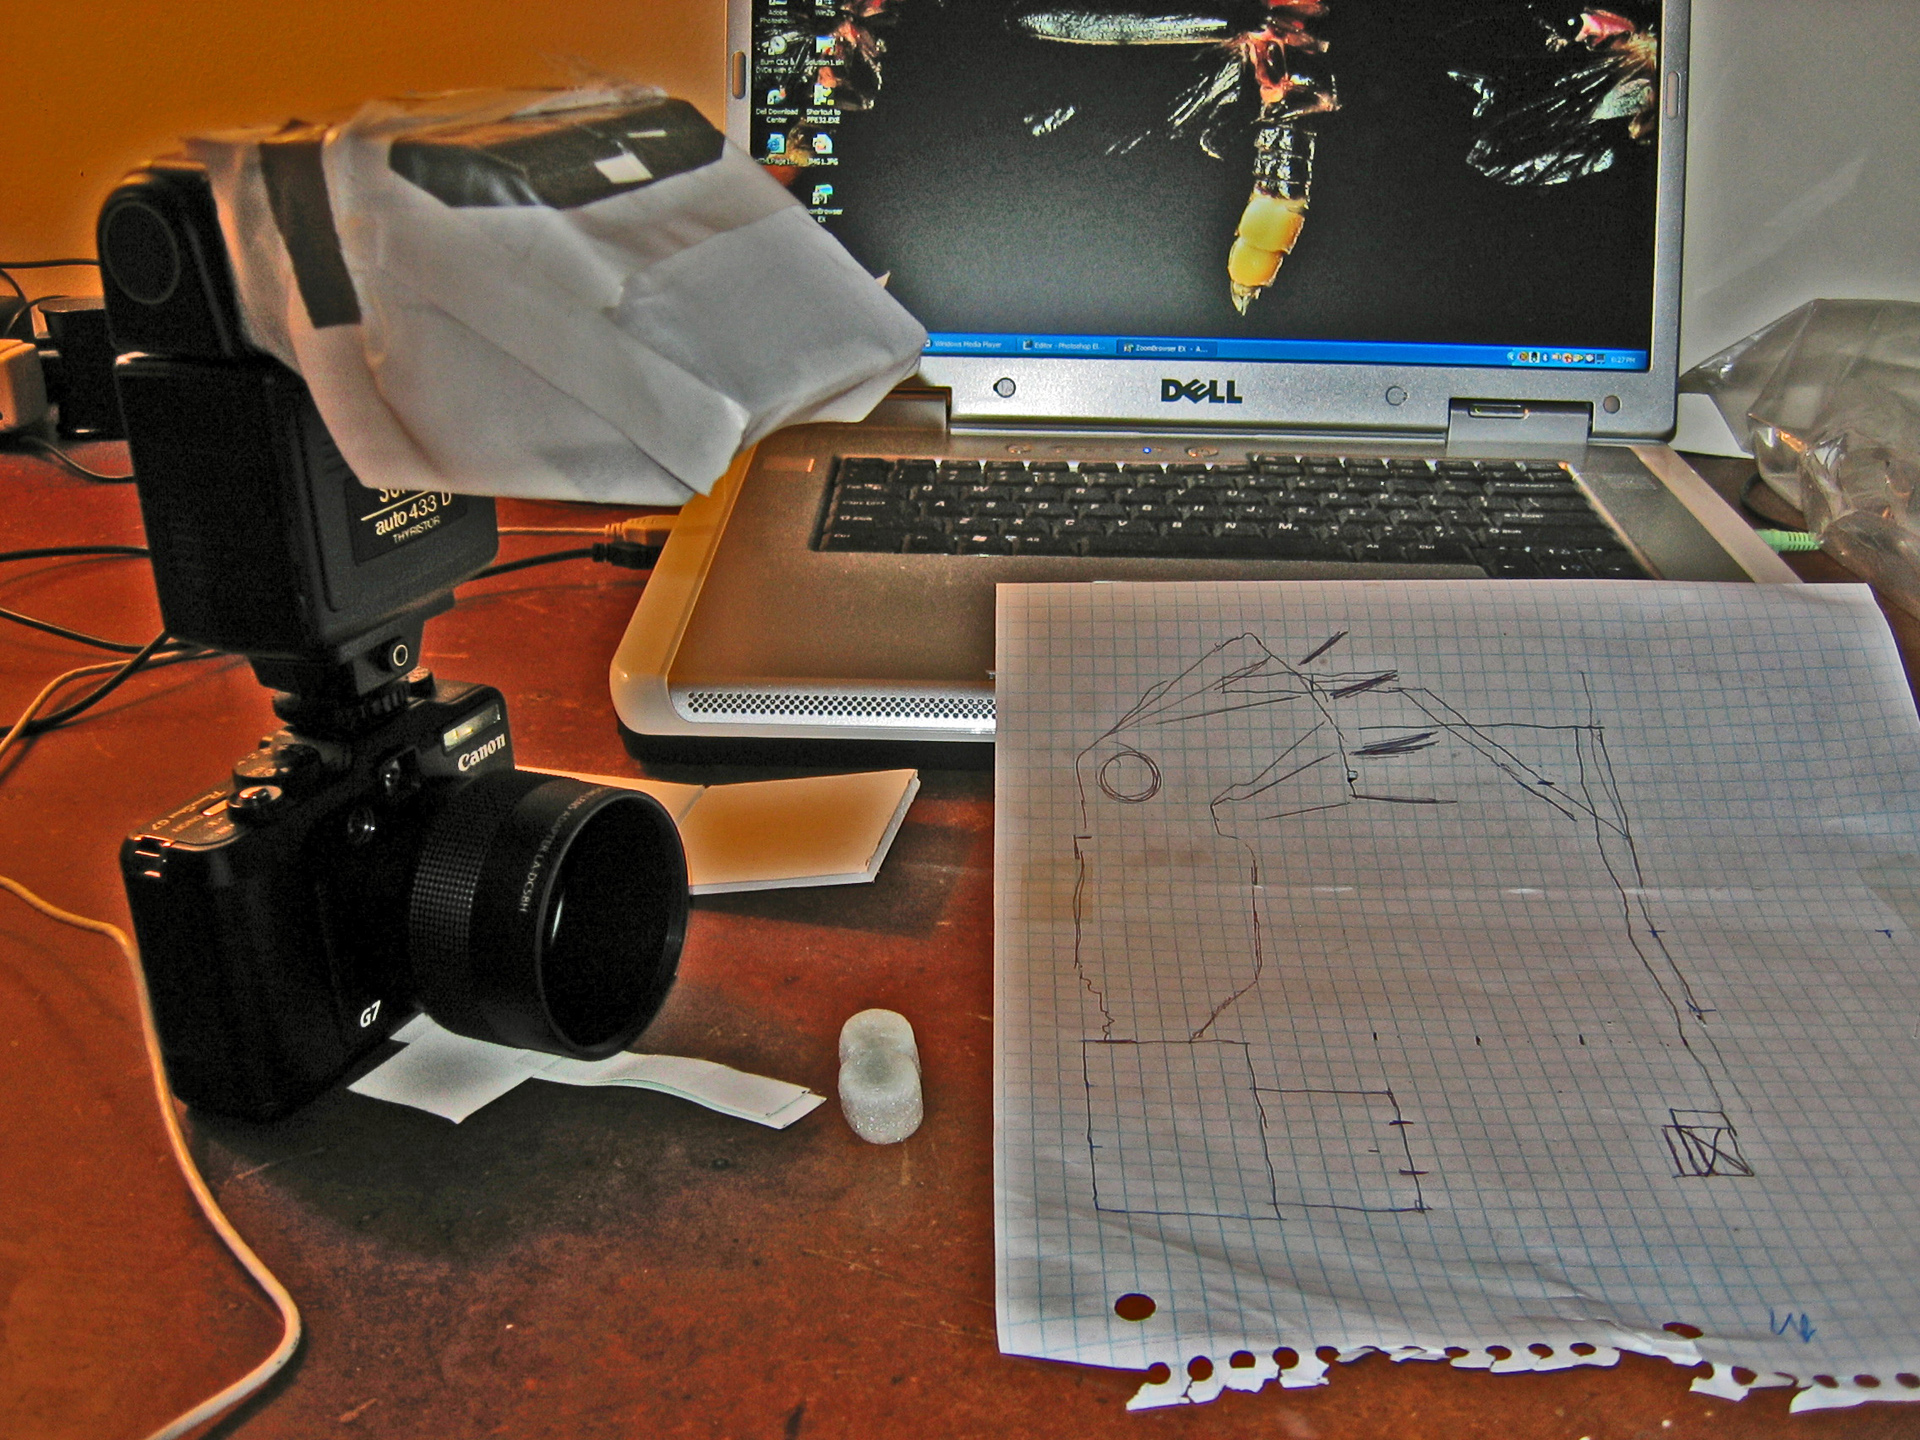
Canon G7, 10mp, fixed lens, hot shoe flash
Camera reflector 2007
After the first year, I wanted a camera with an external flash. I bought a Canon G7, a nice compact fixed lens 10 megapixel. I made a reflector similar to others I had seen to push the light down and packed it with bubble wrap and white cloth. I used an old manual flash from film days and set it to its weakest i.e. fastest speed. The picture quality improved dramatically.
The reflector was made of foam board, ducttape, and chiffon cloth.
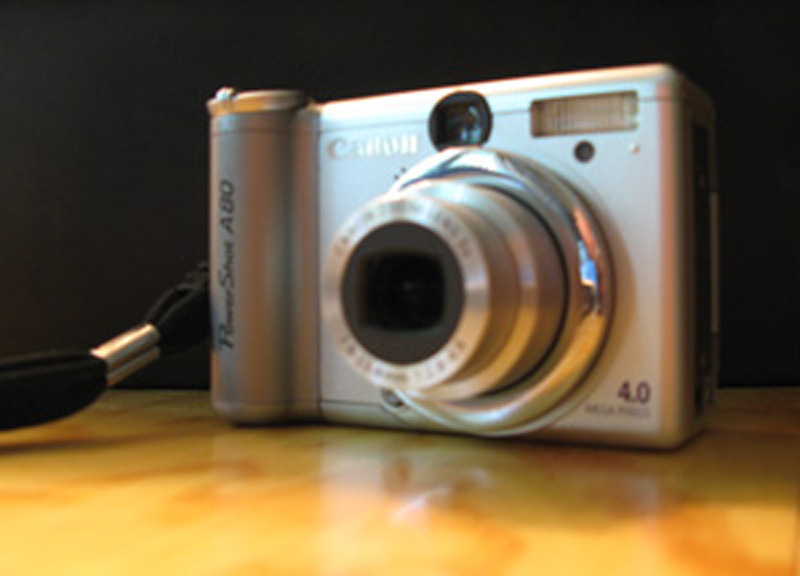
Canon A80, 4mp, fixed lens, built-in flash
Camera 2006
My first digital camera. Point and shoots have automatic controls, but the canon also had a manual mode. They have very small lenses. They can
focus on objects very close to the lens. I set the manual focus to 2 inches. The flash had 3 manual levels. I set it to the weakest one. The shutter speed was set to 1/250 sec. The aperture and iso were both set to their minimums (best quality photo) because there was plenty of flash.